Pin It

Showing posts with label vegetarian. Show all posts

Wednesday, August 19, 2015

Salty and Crispy: Kale Chips

Kale chips have been all the rage for a few years. And why wouldn't they be? Salty. Crispy. Can't Stop At Just One. And (semi) nutritious. What could be better?

They're super easy to make, and it's fun to play with different seasonings and flavorings. I like cracked pepper!


Ingredients:
A bunch of kale
Olive oil
Salt
Seasonings of your choice

Process:
1. Wash kale to remove dirt.
2. Rip chip-sized pieces off the rib of the kale. Discard the ribs. Use salad spinner to dry kale pieces.

3. Toss kale pieces with enough olive oil to lightly coat throughout.
4. Spread on cookie sheets.

5. Sprinkle with salt and other seasonings (I love pepper, for example!).
6. Bake at 350 for 10-12 minutes, or  until kale chips are crisp.

We store ours in open ziploc bags with a piece of paper towel to soak up excess liquid over time.
They should last for up to a week.

Enjoy!  

Thursday, January 1, 2015

A Feast for Our Chickens, 2015

This New Year's Day, we decided to celebrate the lives of our backyard flock chickens. Inspired by Heartland Farm Sanctuary's Feast for the Turkeys event, we made up a meal in which the chickens were the honored guests rather than the main dish.

We halved a few Delicata squashes and filled them with a mix of cranberries, beets, carrots, kale, yogurt, and Bob's Red Mill 10 Grain Cereal.

One half squash for each chicken
We spread them throughout the run.
 As you can see in the pictures below, our chickens were delighted. Rocky, the rooster, expressed  his excitement by getting a case of the hiccups.

Our youngest chickens, hatched on August 18th, are a bit more skittish around us than any of our other chickens have been. Surrounded by squash goodness, they hung out around us this morning as they enjoyed their feast. What a treat for all of us!


Happy New Year!

Monday, November 3, 2014

Salads in Jars

Yumminess before the jars.
A couple of years ago, I made my first set of salads in glass jars for lunches; they were convenient and delicious, but I fell into my old habits and reverted back to leftovers and soups. This past week, our CSA box contained a bag of spinach and another bag of salad greens and carrots and celery and radishes and broccoli and I thought -- hey! I should really get back to those salads.

By the way, making salads in mason jars for weekly lunches is so much faster than making a pot of soup. Duh, right?

The brilliant news is that jar salads stay fresh for a solid 5-7 days. I'll post a picture of Friday's salad later this week just to confirm.


What are the rules?
  • Put the dressing at the bottom. I used 2 Tablespoons, which was plenty for me.
  • Then, put something that can serve as a barrier between the lettuce and dressing. Obviously, this layer is going to get the most exposure to the dressing, so choose a more sturdy vegetable. I used carrots, celery, radishes, and broccoli for this week's salad. Use whatever you have. 
  • Next, add a grain or noodles, if you'd like. I used a quinoa this week.
  • If you're up to it, a protein such as cheese or hard-boiled egg goes next.
  • Finally, the greens themselves.
How do you eat it?
  • I take a bowl to dump mine into, but you could also try your luck just diving right into the glass jar.
  • Just dump it right in!
I use Myfitnesspal.com to track my calories and nutrition information, and I got an immediate green (which is good!) on the fiber section. The other side benefit of making salads in jars is for the sheer aesthetic pleasure of it! They are beautiful.


Sunday, June 1, 2014

CSA: A Bi-Weekly or Weekly Venture?

Everything consumed in time for Box 2!
For years, we've picked up a weekly CSA box on Saturday mornings from the first weekend in May to roughly the end of January. As our farmer predicted, by year three, we had a system to either eat everything or freeze or can that which we did not consume in a week's time. We did well. Our friends would marvel at how we, two people, managed to eat so many veggies.

Well, those days seemed to be over last year. With the purchase of a quarter cow and half of a pig (to be eaten by the omnivore in the family), we found ourselves with loads of roots and greens that ended up being chicken treats by week's end. Additionally, our gardens have grown exponentially in the past half decade, and when we bought a house in the country, we had hoped to someday be much more self-sustainable.

It seemed the time had come to downsize our CSA box, but we have commitment problems hence no children, no addition to the house...you get the idea. Even downgrading our CSA order seemed so daunting, but we took the leap (sarcasm intended for those of you who can never figure out my sense of humor!).

Well, on May 10th a CSA box was delivered to our normal pickup site, and we weren't on the receiving end. Admittedly, we felt a bit deflated. We doubted our decision. Then, May 17th rolled around. What a joyous occasion to see overwintered spinach and parsnips, freshly dug sunchokes, thick pink stalks of rhubarb, and the bright spring green of sorrel. Heavenly.

We think we made the right decision as this past Saturday, the 31st, we picked up our second box and were able to fit all of our new veggies in the fridge because ... get this: all of our other veggies had been consumed in the past 2 weeks. Regardless of how this first month went, we're going to keep track of how often we run out of veggies too early, how often the chickens are benefiting from our lack of consumption, and how much our gardens are contributing to our overall eating plans. We want to be decision-ready come 2015's order.

Something I made last week that was springy, healthy, and entirely local was Sunchoke-Parsnip soup, adapted from our very own Harmony Valley Farm newsletter. Here's how I made mine:

3 sunchokes
4-5 parsnips
2 Tbs. olive oil
1.5 tsp of salt
1 Tbsp butter
2 Tbs. chopped ramps (onions would work too)
1 quart water
2 cups fresh spinach
1 Tbsp lemon juice
ground black pepper, to taste

Instructions:
1. Preheat oven to 375 degrees. Cut parsnips and sunchokes and put them into a baking dish with oil and salt. Roast for 30-45 minutes, or until vegetables are tender 


2. Melt butter in a small saucepan. When the butter has melted, add the ramps and saute. Add the roasted parsnips and sunchokes and water and bring all to a simmer. Simmer for 10 minutes.
3. Remove from the heat and stir in the spinach. Once the spinach is wilted, transfer all to a food processor and blend until smooth. Adjust the seasoning and serve.

Makes 4-6 servings.
Nutritional information per cup:
Calories: 113
Carbs: 10
Fat: 8
Protein: 2
Sodium: 28
Sugar: 5


Sunday, September 8, 2013

A Ratatouille of Sorts

My last post was based off of another person's recipe. This post is based off of another person's recipe. Apparently, I've been more into reading recipes than  I have been into whipping up original creations lately. That said, this ratatouille feels like the answer for every overzealous gardener who finds him/herself with an abundance of veggies. Like the Swiss Roll recipe I posted last month, the ingredients in this recipe are flexible; I've made two different versions during this week alone.

The inspiration for this comes from The Week magazine's "Recipe of the Week" page. Officially called "Ratatouille tian," this is often served over rice or as fillings for a sandwich. Here at our house, we simply make it and serve it up. We also don't have the proper baking ware -- the tian is actually the earthen baking ware used traditionally. We simply used a glass pie pan, which seems to work just fine.

I also would recommend adding in sliced sweet peppers or other vegetables that would caramelize well. 

This recipe is easy to put together, but does require about 1.5 hours of baking!

Ingredients:
3-4 small eggplant
salt
3 tsp herbs de Provence
3-4 zucchini
6-8 Roma tomatoes
olive oil
2 yellow onions
8 fresh sage leaves, minced
2+ garlic cloves, minced

Directions:
1. Cut eggplants into 1/8-inch sections.  In a colander, toss with a teaspoon of salt. Let sit for one (or more) hour(s). Transfer to a bowl, and add a teaspoon of herbs de Provence.
2. Cut zucchini and tomatoes into 1/8-rounds. Put into two separate bowls. Sprinkle each vegetable with 1/2 teaspoon salt and 1 tsp herbs de Provence.
3. Preheat oven to 350. Lightly oil baking dish. Thinly slice onions. Spread them evenly on the bottom of the pan. Drizzle with olive oil and sprinkle with salt.
4. Arrange a row of one of the vegetables along the side of the...pack them tight enough that they almost stand upright. Follow with another row of vegetables. And then the other. Alternate to fill up the pan. If you have extras at the end, simply stuff them into the rows.
5. Drizzle with 3 Tbsp olive oil, spread the minced garlic and cut-up sage leaves among the veggies, and cover loosely with foil. Bake for 30 minutes.
6. Turn up the heat to 425, and bake 30 more minutes.
7. Remove foil, and bake for 30 more minutes or until the veggies are tender, and the tips are lightly browned.
8. Serve  hot, warm, or cold.

Thursday, August 15, 2013

Swiss Chard Rolls

The recipe I want to share with you all today is not my original recipe; it is stolen, but it makes such a delicious and healthy product that I feel compelled to write about it. And it was "stolen" from our CSA newsletter, which makes me feel a little bit more okay with my almost-recipe-plagiarism.

All wrapped and ready to go.
Anyone who has ever grown Swiss Chard and/or collard greens knows that it can be hard to keep up with cutting, using, and really maximizing all of bounty that a few plants offer. I freeze bags full for smoothies and winter stews, but enjoying it in its actual season, and near its raw state, is satisfying. This recipe lends itself to just that.

And one word about the ingredients: like any fold-able food (think burritos, egg rolls), the ingredients in these rolls can vary. I enjoyed the creamy texture that the avocado provides with the slight kick from the jalapeno in this version, but building these really requires a grain, a sauce, and some diced veggies. I intend to play with various versions and spice combos, but I do not doubt that I will come back to this exact version from time to time.

We enjoyed this at an evening at Concerts on the Square with a bottle (or two) of Chardonnay.

Swiss Chard Rolls 
by Chef Beth, Harmony Valley Farm

Makes 8 rolls

8-10 large chard leaves (we also used collard greens)
1/8 cup yellow squash, small dice
1/8 cup cucumber, small dice
1 half avocado, small dice
1/2 cup black beans, rinsed
1 cup seasoned quinoa, cooked
Juice from one lime
1/2 jalapeno pepper, small dice
2 Tbs mayonnaise
1/2 medium sweet Spanish onions, small dice
1 tsp salt
1/2 tsp coarse pepper

1. Bring large sauce pan of salted water to a boil. Blanch each chard or collard green leaf by holding onto the stem, placing the leaf in the boiling water for 15 seconds. Then, transfer to a towel and pat each leaf dry.
2. In a mixing bowl, mix all other ingredients. One by one, fill the leaves, ribbed side facing up, with a spoon of the mixture.
3. Fold in the sides of the leaves, and fold into a roll. Finish by cutting the stem and cutting each roll in half and place on a serving tray. Serve.

Sunday, December 23, 2012

Date Balls

Yesterday, in my blog post about chocolate-covered peanut butter balls, I mentioned that I don't get too into baking for the holidays. Yet, here I am, about to write about another holiday sweet. Today's delight is a bit healthier. It's entirely vegan and raw. I'm writing about date balls!

Medjool dates arrive to our house every year in our CSA box, and often, I don't know what to do with them. They are deliciously sweet and are packed with nutrients (weight for weight more potassium than bananas,  full of fiber, good B-12 complex vitamins...and fat-free), but their caloric make-up is high (65 per one Medjool date). A recipe for Date Balls came with our CSA box this week, and since we're on a running kick in our house, the timing for this recipe seemed perfect. Plus, what a wonderfully healthy addition to the holiday sweet table. Leftovers from there will serve as energy boosts before some big runs or snowshoe adventures in the upcoming weeks.

The recipe couldn't be simpler, and the amount of ingredients is small. Most of the ingredients cannot be bought locally here in Wisconsin, but dates and oranges are in season right now in other places.

Ingredients
1.5 cups of pitted dates
1/4 cup of shredded coconut
3 Tbs. of cocoa powder
optional: 1 tsp. of espresso powder
optional: 1 tsp. of orange zest  

To cover date balls, you could just use one of these or you could make a variety:
coconut flakes
toasted sesame seeds
toasted and finely chopped hazelnuts
toasted and finely chopped pistachios
...and I tried Eden Organic Seaweed Gomasio (Sesame Seeds, Seaweed, & Sea Salt) for some of the balls

Directions:
1. Pit the dates.

2. Mix the pitted dates, the 1/4 cup of coconut, the cocoa powder, and the optional ingredients (if you're using them) in a food processor. Mix until the mixture forms into a ball. If it is too dry, add a teaspoon of water at a time. If it is too wet, add more coconut.

3. Put the date ball coverings into their own bowls.
 
Form 1-inch or smaller balls of the date mixture in your hand, and then roll them in the desired coverings. I got creative here and did some simple, one-covering balls and some mixed.
4. Refrigerate.


Saturday, December 22, 2012

Peanut Butter Balls: A Yummy Tradition

We don't get too into making Christmas cookies here at our house. There is an annual tradition in our extended family for all the ladies to get together a few weeks before Christmas and turn the kitchen into a bakery, so  the family as a whole is plenty stocked come Christmas Eve. However, here at our place, we do create one sweet delectable every December: peanut butter balls. Usually, we give them as gifts at work and save a few for our own holiday festivities; this year, because of two snow days in a row, we have Peanut Butter balls galore.


Other than the rolling-in-chocolate part, these sweet treats are super easy to make.

Ingredients:
2 cups creamy peanut butter
1/2 cup butter
4 cups powdered sugar
3 cups Rice Krispies
...for chocolate sauce...
one 24 oz. bag of chocolate chips
2.5 Tbs of butter

Directions:
1. Melt peanut butter and 1/2 cup butter over stove top.
2. Mix together powdered sugar and Rice Krispies.
3. Pour peanut butter mixture over powdered sugar mixture. Mix well.
4. Form mixture into 1-inch balls. Freeze.
5. Once the balls are frozen, use a double boiler (or a bowl over a pan of hot water like I did) to melt the chocolate. Dip the frozen balls into the chocolate, using a teaspoon. Place on cookie sheet. Freeze again to set.

Without a double-broiler, I just put hot water in a  pan and  put my other ingredients in a metal bowl.

These are always a crowd-favorite, and they make wonderful gifts. Enjoy!

Monday, December 3, 2012

Squash Curry

Something that I make quite often is Squash Curry. It's so simple, and doubling the recipe makes it great for potlucks or packed lunches. Plus, between our gardens and our CSA box, we usually have squash growing out of not only our ears, but our toes and nostrils too.

Ingredients:
1.5 lbs. of cubed squash
1 14-oz can of coconut milk
A few cups of broccoli or other green vegetable
1 medium onion, cubed
1/2 jar of Thai kitchen red curry paste
3/4 cumin seeds
1/3 cup water
1 cinnamon stick
3 cloves
1 Tbs plus 2 tsps of sunflower or olive oil

Optional:
basil leaves
spinach leaves
fish sauce
lime wedges

Directions:
1. Heat 1 Tbs of oil in skillet and add cumin seeds and cubed squash. Heat for 6 minutes or until squash is browned. Turn off.
2. In another pan, add the remaining oil and saute the onion. Add 1/4 of the coconut milk and the red curry paste. Stir over heat until mixed well.
3. Add the squash, rest of the coconut milk, water, cinnamon stick, and cloves. Once the squash is tender, add the broccoli. Heat. If you're adding spinach, fish sauce, or basil, add now too.
4. Serve over rice or on its own. Squeeze lime on for an extra zing.
5. Enjoy!


Sunday, November 25, 2012

An Under-the-Weather Thanksgiving Weekend

All of our plans after a family Thanksgiving on Thursday have been thwarted by illnesses. Bright and early Friday morning, we realized we'd have to cancel my family Thanksgiving, and by last night, it became clear any plans of Christmas-tree shopping or friendly gatherings at our place would have to be postponed. So much for our idealized four-day weekend.

So, now we're on a mission to get better by tomorrow's workday. I've personally been out-of-school for meetings and such so often that I can't justify a sick day tomorrow unless I am unable to physically move.

First up: a juicy concoction. Today, I juiced spinach, ginger, oranges, and Granny Smith apples. Not the prettiest juice, but full of the Vitamin C and other cold-fighting goodies that I need.

Next up: Deborah Madison's Sick Person's Soup. Here's the recipe: http://foodforearthlings.net/delicious-dieters-or-sick-persons-soup/
Deborah Madison's Soup Cookbook is wonderful, and I turn to this recipe at least once per fall/winter to help me or Andy out with preventing and/or conquering an illness. The ginger, cabbage, and spiciness are all so healthy in combination with the warm broth.

And throughout the weekend, we've been pushing Ginger Tea and Green Tea. Luckily, we usually have both ginger and Green Tea on hand.

What about all of you? How do you push through a cold? How do you prevent one in the first place?

Be well.

Monday, January 2, 2012

Homemade Granola


 We finally made a batch of homemade granola. We've talked about wanting to do this for years, but haven't had all of the ingredients at once until our annual co-op shopping trip occurred last week. Now, we have 21 cups of granola to last us for breakfast for the month.

The process was so simple. The possibilities of what to use to make granola are abundant. We chose to make it quite basic this time, adding in random bags of leftover holiday nuts and seeds.

This batch's ingredients:
8 cups of oats
2 cups of flaxseed meal
1/2 cup of hazelnuts
2 cups of pumpkin seeds
2 cups of honey
1.5 cups of sunflower oil
2 cups of dried cranberries
2 cup of raisins

Instructions:
1. Preheat the oven to 350.
2. Mix oats, flaxseed meal, nuts, and seeds together.
3. Mix the honey and oil.
4. Pour the honey-oil mixture over the dried ingredients.
5. Spread mixture out on baking sheets. Bake until golden brown, about 45 minutes, stirring occasionally.
6. Remove the granola. Allow to cool, stirring occasionally. Stir in the dried fruit.  Store in an airtight container.


Here is the nutrition information for 1/3 cup servings:
Calories, 180; Fat, 9.5; Sat. Fat 1; Trans Fat, 0; Cholesterol, 0; Sodium, 2; Carbs, 21; Fiber, 3; Sugars 10.8; Protein, 3.7; Vitamin A, 13; Vitamin C, .2; Calcium, 14; Iron, 1.3

According to my diet tracker, the amount of fat, sat. fat, protein, and sodium are great for this serving size.

Monday, November 28, 2011

Thanksgiving Favorites, 2011

We were lazy this Thanksgiving. The appetizer we shared with our families involved zero preparation. We simply opened jars, did a bit of slicing and dicing, and viola - complete!  As the holidays approached, we realized we had done a lot of pickling and fermenting this summer. We decided to share a platter of salty, sweet, bitter, and sour flavors. And so, this year, we are especially thankful for healthy, organic produce and for the steamy summer nights we dealt with it all over gigantic cups of iced coffees. Those memories are ones we'll never forget because there really is nothing as romantic as two sweaty adults in a closet-sized kitchen with water canners heating up the already 90+ degree house. Thankful, we are.

Our pickle tray consisted of:
balsamic onions
sour pickles
spicy sliced carrots
dill rat-tail radishes
sweet pepper marmalade served with cream cheese and crackers
pickled spring garlic

On Thanksgiving day, while the Packers won their 11th game this season, some braver family members filled snack plates with pickles. During Lappsgiving (what we've begun to affectionately call our second Thanksgiving), we chatted while delighting in these finger foods while we sipped glasses of wine. Zero preparation, and tons of taste. Pickling a variety in the summer and serving these foods up for holidays could easily become a tradition.

As always, for "Lappsgiving," we made the holiday menu from the current issue of Vegetarian Times. This year's "French twist" menu was not as scrumptious as that in 2009 or 2010, but it was still pleasing to our palettes.

The foods we decided to make were:

Salad of Shaved Fennel, Oranges, and Candied Pecans (YUM!)

Spiced Balsamic Beet Compote (DOUBLE YUM...a definite keeper!)
Seiten Timbales with Chestnut-Champignon Stuffing


...and, of course, we made the same dessert we always make for Thanksgiving: Ginger Sweet Potato Pie.
Ginger Sweet Potato Pies
Mostly because I don't want to forget either the candied pecan recipe or the spiced balsamic beet compote recipe, I'm going to share them here.

First, the candied pecans. These would go well in virtually any fall salad.

Ingredients:
1/2 cup pecans, halved and quartered
1 Tbs. pure maple syrup
1/2 tsp. sugar
1/2 tsp. salt
1 pinch cayenne pepper

Instructions:
1. Preheat oven to 400 degrees F. Toss pecans with maple syrup in a small bowl. Add sugar, salt, and cayenne pepper. Toss to coat.
2. Spread nuts on baking sheet, and roast 10 minutes or until crispy and aromatic.
3. Cool for 10 minutes.

And, now for a new favorite appetizer, which is sure to turn up again and again in our house. We liked it over goat cheese on a sourdough baguette, but my parents liked it over cream cheese. This is a great way to use a lot of beets!

Spiced Balsamic Beet Compote
Ingredients:
1/2 cup golden raisins (we used dates because that's what we had, but I bet raisins would be even better!)
2 large beets (about 3 cups)
2 Tbs. olive oil
1/2 tsp. garam masala or curry powder
2 shallots (we used one onion and one clove of garlic)
2 Tbs. balsamic vinegar
2 tsp. sugar
1 tsp. salt 

Instructions:
1. Cover raisins with boiling water, and let stand 30 minutes.
2. Cook beets in large pot of boiling water for 10 minutes, or until tender. Drain and set aside.
3. Heat oil in large skillet over medium  heat. Add spice, and cook 20 seconds. Add shallots (or garlic and onion), and saute 20 minutes. Stir in beets, raisins, vinegar, sugar, salt, and 1/2 cup water.
4. Cover, and simmer 20 minutes, or until compote is thickened. Cool.

Tuesday, November 22, 2011

Breakfast for Dinner: Squash-Cranberry-Pecan Pancakes

Pancakes and sausage for the carnivore in the house
Tonight, we had breakfast for dinner. Not just your standard buttermilk pancakes or eggs and bacon. We had Squash-Cranberry-Pecan Pancakes drenched in maple syrup. Two nights ago, we had Squash-Date Bread Pudding drenched in half and half. Andy's on a squash baking kick with our new oven and stockpile of pumpkins and baking squash, and I'm not complaining at all (though I am concerned about how my pants fit today...).  Heck, he's even been whipping up  pureed squash with bacon every morning for the dog. 

Our Amish Pie Squash apparently have inspired him. Who are Franklin (the dog) and I to object?
Amish Pie Squash
 
If you have extra baking squash, pumpkin or pumpkin pie filling, I highly recommend trying this or a version of it for breakfast, lunch, or dinner sometime soon. The smell of fall - nutmeg, cinnamon, and squash are literally filling up our small house with warmth right now, and the taste is divine.

For a batch of about 12-16 pancakes, you need the following:

Ingredients:
3 large eggs
3/4 cup of pureed squash
1/2 pint of cranberries
1/2 cup pecan, chopped
1 qt kefir
1 tsp vanilla
2 oz melted butter
3 cups flour
1 tsp salt
3 tbs. sugar
a pinch of cinnamon
a pinch of nutmeg
1/2 cup of sugar for cranberries
1 tsp baking soda
1 tsp baking powder
1/2 cup oats
1 tbs butter
Instructions:
1. Put cranberries in pot with 1/2 cup of water and 1/2 cup of sugar. Bring to a boil until they begin to pop. Turn the heat off, and let the cranberries cool.
2. Mix the eggs, keifer, vanilla, and melted butter.
3. Stir together the flour, salt, sugar, baking powder, and oats.
4. Combine wet and dry ingredient mixtures, and then add the pureed pumpkin. Then, add the cranberries and pecans.
5. On a heated and buttered pan, make pancakes. Heat both sides, and serve up with maple syrup!
Pureed squash
Preparing the cranberries       


Heating them up!


Monday, October 31, 2011

My friend Deb and her wonderful Cabbage Soup

With a generous dollop of sour cream and freshly ground pepper!
Deborah Madison is the bomb, or rather, the bombess (?). Seriously, if you don't have Vegetable Soups from Deborah Madison's Kitchen, please buy it. We swear that just as we navigate towards deep reds at the liquor store, you'll no doubt find your fingers reaching for this cookbook whenever you're in the mood for a comforting bowl of soup or you need to use a bunch of a veggies up in one cooking adventure. Just take a look at the series of posts we put up last harvest season. Deborah Madison came up more than once then, and we're sure she'll come up more than once this year.

Tonight, we quickly whipped up a double batch of her Green Cabbage Soup with potatoes and sour cream. As always, we didn't quite have the right ingredients in the fridge, so we made our adaptations with what we found at home, plus garlic, of course. Here's our doubled version of  Deborah's (yes, at this point, I feel like we're on a first-name basis!) creation:

Ingredients:
1 small green cabbage, preferably Savoy
4 Tbs. of butter
1 bunch of mustard greens, boiled before added to the mix (our addition)
3 large leeks
6 potatoes, with skins
sea salt and freshly ground pepper
1 head of garlic, minced (our addition)
sour cream or yogurt
tops of celeriac (though Deb uses parsley or dill)

Directions:
1. Thinly slice the cabbage and mustard greens. Boil a pot of water, add the cabbage and greens, cook for a minute, and then drain.
2. Melt the butter in a soup pot (Debbie had 2-3 Tbs. for a single batch, but we wanted to cut out fat). Add the leek and potato, cook for a minute or two, and then add the cabbage and greens and salt. Pour 10 cups of water over the top.  Bring to a boil, then lower the heat and simmer, covered, for 20 minutes or until the potatoes are tender. Taste for salt and pepper.
3. Ladle the soup into bowls, then add a dollop of sour cream or yogurt, a sprinkling of your herb of choice, and a final grinding of ground pepper.

Get a nice beverage, and have a toast to Ms. Madison for her wonderful soups, and a toast to yourself for a job well done! Enjoy.

Per 1 Cup Servings: 103 calories; Total Fat, 3.5 g; Saturated Fat, 1.7 g; Cholesterol, 9 mg; Sodium, 258 mg; Carbohydrate, 17.6 g; Dietary Fiber, 2.5 g; Sugars, 1.6 g; Protein, 2.6 g

Sunday, October 23, 2011

Eating Seasonally: Practice Makes Perfect

Recently a friend asked, "How do you use all of your CSA box and garden?"  This wasn't the first time a friend or family member has wondered that. After seven years of membership, we have worked out a system. We 100% build our weekly menu around the box, and one big way that we use an armful of vegetables is in a weekly soup or salad for lunch. Today, we made a lentil-and-curry based soup. Typically, we start with a base, such as this, and then we look through the refrigerator to find vegetables that will meld well.

Tonight, we each devoured steaming bowls of this new creation, topped with sour cream. So delicious that we decided to make the recipe permanent, right here, on our blog. Of course, living with a CSA box and a huge garden doesn't always lend itself to replicating recipes ingredient-by-ingredient, so this will always remain a skeleton, unless the stars and veggies align next fall, and we find ourselves with the same exact ingredients and happen to remember this specific mix on that day.

Here's what we used:
3 carrots
4 cups of escarole
2 cups of dry lentils
6 cups of water and vegetable broth mix
3 potatoes
1 small head of cauliflower
1 head of garlic
2 leeks
2 Tbs. butter
2 Tbs. curry paste
1 lemongrass sprig
3 tomatoes
sour cream (optional)

Directions:
1. We heated the butter in a soup pan and added the leek, garlic, and lentils. We allowed this to cook for a couple of minutes.
2. Then, we added the broth, tomatoes, carrots, and lemongrass. We brought it to a boil.
3. Then, we added the rest of the ingredients, except for the escarole, and let it cook until the lentils were tender.
4. We added the escarole at the end, let it wilt, and then served it up for dinner. It was wonderful topped with a bit of sour cream.

It made 13 cups. We each had one cup for dinner, and we stored the rest in Ball jars (1-cup in each). We'll have an easy, go-to lunch for the rest of the week.

Dinners will consist of plant-based ingredients, both from our box and from our garden. Whatever isn't used by the end of the week will go in the freezer. Eating seasonally definitely takes planning, but once you get the hang of it, it is easy ....and dare I say, fun!?


Sunday, September 18, 2011

A Produce Plus Weekend: Sweet Peppers, Edamames, and Cucumbers


We spent the better part of our weekend in the kitchen. But, as I've written before, spending time in the kitchen with a large glass of wine and some good tunes with the one I love is a beautiful thing. So, what did we make? Well...

On Friday, Andy brought home a large pail of cucumbers from his colleague. What a generous lady! We decided to make those in the crock like we did earlier this year. The recipe for that is here. Our first batch is in the fridge, and the pickles are wonderfully crunchy. So, we figured why veer away from a good recipe? (Well, other than the fact that our fridge is very near capacity...we really need a second one to store all of this live food we've been creating.)

On Saturday morning, we picked up 5 pounds of mini sweet peppers and 10 pounds of edamame from the Harmony Valley Farm stand at the Farmers' Market. Juan happily handed us our boxes in return for our check. We love produce plus opportunities ~ they always lend themselves to weekends in the kitchen, preserving up food for the winter, but we are relishing the day when our gardening skills are so fierce that we won't even be tempted to order and pay for produce plus. We look forward to the day when we're swimming in tons of tomatoes and crowded out of the house by piles of edamames and peppers. But until then, produce plus is a perfect way to support a local, sustainable grower, while making an effort to eat  both seasonally and locally.

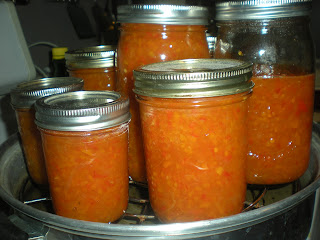
Funny thing about this week's produce plus pepper purchase is that we had no idea what we'd do with the sweet peppers once we got them. When we received the email that for the first time ever, these mini bursts of goodness were for sale in huge increments, we leaped at the chance. We began receiving these in our box about two years ago, and since then, they're one item we can't seem to tire of. As the summer winds down, at least there are mini-sweet peppers!. Honestly, they are mouth-poppingly delicious. Andy and I both eat them raw, plain or stuffed with cheese. So, what to do with 5 lbs of them? We tossed around roasting and freezing some, just freezing others, pickling them, making them into jelly, or even candying them. But then, this week's CSA newsletter featured mini sweets and provided a recipe for sweet pepper marmalade, and we were sold on that idea. The cans of red, yellow, and orange sweetness are gorgeous, and we're looking forward to sharing some over the holidays. The newsletter suggested serving with pretzels or crackers and cream cheese or goat cheese. Don't those ideas sound absolutely delicious?

...oh...and about that gardening goal, we saved a ton of sweet pepper seeds.

And, as for the ten pounds of edamame, simple! We blanched them (in shells) for three minutes, put them in a water bath, divided them up into freezer bags (2 cups per bag) and froze them. How great will an edamame salad be in the middle of a Wisconsin winter? So good. I'm already planning out my day of "summer eating" on a negative degree day: frozen watermelon juice-vodka drinks, edamame salad, and grilled veggie burgers perhaps?  I think I need to start getting bikini-ready for that fun day inside the confines of my cozy home now.

Here is the recipe we used (courtesy of Harmony Valley Farm) for the pepper marmalade:

1 cup sweet peppers, small dice
1 cup onion, small dice
1 cup sugar
1/3 cup white distilled vinegar
1/3 cup apple cider vinegar
1/4-1/2 tsp chili flake

Combine all ingredients in a medium saute pan.

Simmer over medium heat for 5 minutes. Reduce heat and simmer another 20 minutes or until liquid is syrupy. You can store in the fridge for several weeks or can and process 10 minutes in a hot water bath.


Our weekend totals are:
1 crock full of pickles
approx. 6 pints of sweet pepper marmalade (1/2 quart for the fridge)
17 frozen cups of edamame


Tuesday, September 6, 2011

Homemade Hot Sauce!

Cayanne, Seranno, Joe's Round (missing jalapeno)
We're addicted to hot sauce. We like hot sauce on our eggs. We like hot sauce on our potatoes. We like hot sauce on our burgers/veggie burgers.We like hot sauce on our popcorn. Aside from desserts, we like hot sauce on just about everything. So, as you can imagine, making our own has come to mind.

A few years ago, we made a sort of buffalo-type hot sauce. Of course, that was before this blog, so we can't remember how we managed that at all. I do remember that it was fabulous over some oven-baked potatoes, sprinkled with blue cheese.

This year, we're trying the old-fashioned pepper fermentation method. Included are a lot of Cayenne peppers (thanks to Andy's colleague!), Joe's rounds (super hot!), jalapenos, and Serrano peppers. They're mashed up and fermenting as we speak. In fact, they've been fermenting since Saturday.

To do this, we simply (and with gloves on!):

1. removed the stems.
2. put all of the peppers in the Cuisinart
3. added salt (1.5 teaspoon per cup of mashed peppers)

4. put the mash in a Ball jar (though you could use a crock or a food-safe plastic container)
5. weighed down the mash with another jar, and
6. covered the whole operation with a towel

...and now we'll wait for a month or more for the flavor to develop. Throughout this process, we have to make sure that the liquid covers the mash; it's a crucial part of the fermentation process. If there is not enough liquid to cover the mash, we'll add salted water.

Soon, we'll be left with hot sauce to put into a bottle or two and store in the fridge.

I can't wait! I'm sure whatever I make for dinner the day it's ready will be a perfect meal for hot sauce.