Pin It

Friday, December 30, 2011

Co-op Gift Card: Year Three

The whole spread (minus the chicken feed)

If you've been following our blog for a while, you might remember that one of our most anticipated and useful Christmas presents is a gift card to our absolute favorite place to shop: the Willy Street Co-op. Mr. and Mrs. Claus have bestowed upon us this wonderful gift three times, and each time, I believe Andy and I have gotten better at figuring out how to get the most bang for our buck.


Veggie Burger Ingredients
Before heading to the co-op, we sit down to brainstorm a few meals to make in bulk and freeze - we try to coincide those with our financial and dietary pitfalls. Anyone who knows Andy knows he has a slight addiction to pizza. So,this year, we canned extra pizza sauce, and with our gift card, we bought enough mozzarella cheese to make me reconsider our need to own our very own cow!  Another way that we fail to live sustainably, both in terms of ethical food production and our personal finances is going out to eat during the work week. Usually this is because we don't have the time or the energy to use the ingredients residing in our fridge and cupboard. So, we bought all of the ingredients to quadruple our recipe for veggie burgers. This way, hopefully, when one of suggests going to Chipotle, the other can counter-argue that by pointing out we have veggie burgers in the freezer and potatoes in the cupboard.

Oftentimes, an argument against shopping for whole, organic, local foods is that it is too expensive. This is where being shopper savvy comes in handy. The back of our Subaru is loaded with canvas totes, Ball jars, canisters, and reused glass bottles because we buy nearly everything that we can't get from our CSA or garden in bulk. Local and/or organic bulk foods are surprisingly reasonable. Yesterday, we stocked up on maple syrup, honey, oats, peppercorns, coffee beans, milk powder, a few spices, and chicken feed.
Ingredients for granola
Milk powder for yogurt

A few other necessities...

Our personal New Year's Resolutions involve financial, dietary, and sustainability goals. This co-op trip and the cooking resulting afterward were a perfectly wonderful way to work towards those....for FREE! Thanks to Mr. and Mrs. Clause for once again helping us reach our goals.

Thursday, December 29, 2011

What to do with all of those holiday leftovers?

This Christmas, like all others, we ended the evening too full to even consider dessert. Thankfully, we had stuffed ourselves with Christmas cookies all day long anyway, so we had our go at the sweet stuff.

The Poquette-Lapp Christmas dinner is what many would consider the traditional Thanksgiving dinner. Our menu hasn't changed much from last year, but we did have a few highlights.

We began the day with  Irish Cream (of course) and cheese, crackers, and trail mix. That evening, our menu was as follows:
The brussel sprouts were a new addition. At the last second, we Wisconsinites went out to our brownish-green yard, found our way to our still half-living garden, and picked a fresh stalk of Brussel Sprouts. It's worth noting because this may never happen on Christmas Day in Wisconsin to us again. We actually still have two more stalks to pick -- it's looking good that we may get fresh Brussel Sprouts again on New Year's.

Another reason to mention the Brussel Sprouts is that they ended up being the main attraction at dinner. To make them, you need:

  • one stalk of Brussel Sprouts
  • 1/2 lb. of bacon, diced
  • seasoning (salt, pepper, etc.)
  • a tiny drizzle of olive oil
Instructions:
  1. Toss diced bacon, halved Brussel sprouts, and seasoning together. If the bacon isn't giving off enough fat, a drizzle of olive oil may be necessary.
  2. Dump onto baking sheet. Put in the oven at 425 until done.

The pets thoroughly enjoyed Christmas also, as you can see in the pictures below.
Franklin enjoying his first turkey dinner.

Benson --after a little too much to drink :)


 Yesterday, we used the leftover cranberry relish as a topper to a wedge of brie and toasted baguettes as an appetizer. Yum! For the main course last evening, we made a half-vegetarian, half-turkey casserole using the leftover turkey and stuffing. Both the appetizer and the casserole were divine, and our fridge is much more manageable today without all of the leftovers occupying every shelf.

Here's our rough recipe for Fetttuccine Turkey Casserole

3 cloves of garlic, minced
2 Tbs. butter
1-2 Tbs. flour
4 cups of 2% or whole milk
4-6 oz. cream cheese
1/2 c. shredded Romano cheese
1/2 c. shredded Parmesan cheese
leftover turkey
leftover stuffing
fettuccine noodles

1.To make the alfredo sauce,
  • Melt butter in saute pan. Add garlic, and saute for about one minute. Add flour. Cook until golden. This is called a roux.
  • Slowly mix in the milk. Heat on medium-high heat until milk begins to boil. Reduce heat. Add cream cheese in cubes. Continue stirring until cream cheese is combined thoroughly. Gradually reduce the heat as you add in the Parmesan and Romano cheese.
2.  Boil noodles. Drain. Put them in a baking dish, mix in the turkey chunks, and pour sauce over the mixture. Top with stuffing, and grate fresh Parmesan over the top.

3. Bake at 350 until the sauce is bubbly, 20-25 minutes.


Monday, November 28, 2011

Thanksgiving Favorites, 2011

We were lazy this Thanksgiving. The appetizer we shared with our families involved zero preparation. We simply opened jars, did a bit of slicing and dicing, and viola - complete!  As the holidays approached, we realized we had done a lot of pickling and fermenting this summer. We decided to share a platter of salty, sweet, bitter, and sour flavors. And so, this year, we are especially thankful for healthy, organic produce and for the steamy summer nights we dealt with it all over gigantic cups of iced coffees. Those memories are ones we'll never forget because there really is nothing as romantic as two sweaty adults in a closet-sized kitchen with water canners heating up the already 90+ degree house. Thankful, we are.

Our pickle tray consisted of:
balsamic onions
sour pickles
spicy sliced carrots
dill rat-tail radishes
sweet pepper marmalade served with cream cheese and crackers
pickled spring garlic

On Thanksgiving day, while the Packers won their 11th game this season, some braver family members filled snack plates with pickles. During Lappsgiving (what we've begun to affectionately call our second Thanksgiving), we chatted while delighting in these finger foods while we sipped glasses of wine. Zero preparation, and tons of taste. Pickling a variety in the summer and serving these foods up for holidays could easily become a tradition.

As always, for "Lappsgiving," we made the holiday menu from the current issue of Vegetarian Times. This year's "French twist" menu was not as scrumptious as that in 2009 or 2010, but it was still pleasing to our palettes.

The foods we decided to make were:

Salad of Shaved Fennel, Oranges, and Candied Pecans (YUM!)

Spiced Balsamic Beet Compote (DOUBLE YUM...a definite keeper!)
Seiten Timbales with Chestnut-Champignon Stuffing


...and, of course, we made the same dessert we always make for Thanksgiving: Ginger Sweet Potato Pie.
Ginger Sweet Potato Pies
Mostly because I don't want to forget either the candied pecan recipe or the spiced balsamic beet compote recipe, I'm going to share them here.

First, the candied pecans. These would go well in virtually any fall salad.

Ingredients:
1/2 cup pecans, halved and quartered
1 Tbs. pure maple syrup
1/2 tsp. sugar
1/2 tsp. salt
1 pinch cayenne pepper

Instructions:
1. Preheat oven to 400 degrees F. Toss pecans with maple syrup in a small bowl. Add sugar, salt, and cayenne pepper. Toss to coat.
2. Spread nuts on baking sheet, and roast 10 minutes or until crispy and aromatic.
3. Cool for 10 minutes.

And, now for a new favorite appetizer, which is sure to turn up again and again in our house. We liked it over goat cheese on a sourdough baguette, but my parents liked it over cream cheese. This is a great way to use a lot of beets!

Spiced Balsamic Beet Compote
Ingredients:
1/2 cup golden raisins (we used dates because that's what we had, but I bet raisins would be even better!)
2 large beets (about 3 cups)
2 Tbs. olive oil
1/2 tsp. garam masala or curry powder
2 shallots (we used one onion and one clove of garlic)
2 Tbs. balsamic vinegar
2 tsp. sugar
1 tsp. salt 

Instructions:
1. Cover raisins with boiling water, and let stand 30 minutes.
2. Cook beets in large pot of boiling water for 10 minutes, or until tender. Drain and set aside.
3. Heat oil in large skillet over medium  heat. Add spice, and cook 20 seconds. Add shallots (or garlic and onion), and saute 20 minutes. Stir in beets, raisins, vinegar, sugar, salt, and 1/2 cup water.
4. Cover, and simmer 20 minutes, or until compote is thickened. Cool.

Tuesday, November 22, 2011

Breakfast for Dinner: Squash-Cranberry-Pecan Pancakes

Pancakes and sausage for the carnivore in the house
Tonight, we had breakfast for dinner. Not just your standard buttermilk pancakes or eggs and bacon. We had Squash-Cranberry-Pecan Pancakes drenched in maple syrup. Two nights ago, we had Squash-Date Bread Pudding drenched in half and half. Andy's on a squash baking kick with our new oven and stockpile of pumpkins and baking squash, and I'm not complaining at all (though I am concerned about how my pants fit today...).  Heck, he's even been whipping up  pureed squash with bacon every morning for the dog. 

Our Amish Pie Squash apparently have inspired him. Who are Franklin (the dog) and I to object?
Amish Pie Squash
 
If you have extra baking squash, pumpkin or pumpkin pie filling, I highly recommend trying this or a version of it for breakfast, lunch, or dinner sometime soon. The smell of fall - nutmeg, cinnamon, and squash are literally filling up our small house with warmth right now, and the taste is divine.

For a batch of about 12-16 pancakes, you need the following:

Ingredients:
3 large eggs
3/4 cup of pureed squash
1/2 pint of cranberries
1/2 cup pecan, chopped
1 qt kefir
1 tsp vanilla
2 oz melted butter
3 cups flour
1 tsp salt
3 tbs. sugar
a pinch of cinnamon
a pinch of nutmeg
1/2 cup of sugar for cranberries
1 tsp baking soda
1 tsp baking powder
1/2 cup oats
1 tbs butter
Instructions:
1. Put cranberries in pot with 1/2 cup of water and 1/2 cup of sugar. Bring to a boil until they begin to pop. Turn the heat off, and let the cranberries cool.
2. Mix the eggs, keifer, vanilla, and melted butter.
3. Stir together the flour, salt, sugar, baking powder, and oats.
4. Combine wet and dry ingredient mixtures, and then add the pureed pumpkin. Then, add the cranberries and pecans.
5. On a heated and buttered pan, make pancakes. Heat both sides, and serve up with maple syrup!
Pureed squash
Preparing the cranberries       


Heating them up!


Monday, October 31, 2011

My friend Deb and her wonderful Cabbage Soup

With a generous dollop of sour cream and freshly ground pepper!
Deborah Madison is the bomb, or rather, the bombess (?). Seriously, if you don't have Vegetable Soups from Deborah Madison's Kitchen, please buy it. We swear that just as we navigate towards deep reds at the liquor store, you'll no doubt find your fingers reaching for this cookbook whenever you're in the mood for a comforting bowl of soup or you need to use a bunch of a veggies up in one cooking adventure. Just take a look at the series of posts we put up last harvest season. Deborah Madison came up more than once then, and we're sure she'll come up more than once this year.

Tonight, we quickly whipped up a double batch of her Green Cabbage Soup with potatoes and sour cream. As always, we didn't quite have the right ingredients in the fridge, so we made our adaptations with what we found at home, plus garlic, of course. Here's our doubled version of  Deborah's (yes, at this point, I feel like we're on a first-name basis!) creation:

Ingredients:
1 small green cabbage, preferably Savoy
4 Tbs. of butter
1 bunch of mustard greens, boiled before added to the mix (our addition)
3 large leeks
6 potatoes, with skins
sea salt and freshly ground pepper
1 head of garlic, minced (our addition)
sour cream or yogurt
tops of celeriac (though Deb uses parsley or dill)

Directions:
1. Thinly slice the cabbage and mustard greens. Boil a pot of water, add the cabbage and greens, cook for a minute, and then drain.
2. Melt the butter in a soup pot (Debbie had 2-3 Tbs. for a single batch, but we wanted to cut out fat). Add the leek and potato, cook for a minute or two, and then add the cabbage and greens and salt. Pour 10 cups of water over the top.  Bring to a boil, then lower the heat and simmer, covered, for 20 minutes or until the potatoes are tender. Taste for salt and pepper.
3. Ladle the soup into bowls, then add a dollop of sour cream or yogurt, a sprinkling of your herb of choice, and a final grinding of ground pepper.

Get a nice beverage, and have a toast to Ms. Madison for her wonderful soups, and a toast to yourself for a job well done! Enjoy.

Per 1 Cup Servings: 103 calories; Total Fat, 3.5 g; Saturated Fat, 1.7 g; Cholesterol, 9 mg; Sodium, 258 mg; Carbohydrate, 17.6 g; Dietary Fiber, 2.5 g; Sugars, 1.6 g; Protein, 2.6 g

Sunday, October 23, 2011

Eating Seasonally: Practice Makes Perfect

Recently a friend asked, "How do you use all of your CSA box and garden?"  This wasn't the first time a friend or family member has wondered that. After seven years of membership, we have worked out a system. We 100% build our weekly menu around the box, and one big way that we use an armful of vegetables is in a weekly soup or salad for lunch. Today, we made a lentil-and-curry based soup. Typically, we start with a base, such as this, and then we look through the refrigerator to find vegetables that will meld well.

Tonight, we each devoured steaming bowls of this new creation, topped with sour cream. So delicious that we decided to make the recipe permanent, right here, on our blog. Of course, living with a CSA box and a huge garden doesn't always lend itself to replicating recipes ingredient-by-ingredient, so this will always remain a skeleton, unless the stars and veggies align next fall, and we find ourselves with the same exact ingredients and happen to remember this specific mix on that day.

Here's what we used:
3 carrots
4 cups of escarole
2 cups of dry lentils
6 cups of water and vegetable broth mix
3 potatoes
1 small head of cauliflower
1 head of garlic
2 leeks
2 Tbs. butter
2 Tbs. curry paste
1 lemongrass sprig
3 tomatoes
sour cream (optional)

Directions:
1. We heated the butter in a soup pan and added the leek, garlic, and lentils. We allowed this to cook for a couple of minutes.
2. Then, we added the broth, tomatoes, carrots, and lemongrass. We brought it to a boil.
3. Then, we added the rest of the ingredients, except for the escarole, and let it cook until the lentils were tender.
4. We added the escarole at the end, let it wilt, and then served it up for dinner. It was wonderful topped with a bit of sour cream.

It made 13 cups. We each had one cup for dinner, and we stored the rest in Ball jars (1-cup in each). We'll have an easy, go-to lunch for the rest of the week.

Dinners will consist of plant-based ingredients, both from our box and from our garden. Whatever isn't used by the end of the week will go in the freezer. Eating seasonally definitely takes planning, but once you get the hang of it, it is easy ....and dare I say, fun!?


Fall Harvest: Beans and Greens


Beautiful Swiss Chard
We've been busy, busy the past few weeks and weekends, as I'm sure most of you all have been. Luckily, the weather has been such that we personally haven't been too worried about the veggies left in our garden or the amount of work yet to be done before the first snowfall. This weekend, other than Saturday-morning test proctoring and Sunday paper-correcting, we had no plans! While it seems we have overzealous ideas about the amount of work that realistically can be done in a day, we still managed to get a significant start on cleaning up a few garden beds and harvesting/preserving a bit of food.

First, we harvested three of our four pole bean beds. Our Trail of Tears Black Bean bed was full of skinny, gray/brown pods. Each contained about 8 small beans inside. We managed to get a whole quart of those. Our Mother Stallard bean beds produced about a quart also. Dry beans are a must for growing in our semi-vegetarian  household. We've already decided that  next year, we will triple the amount of beans. Not only are homegrown beans 100% ethical, they are also economical. Compare the price of a burger to that of a homemade bean burger made with beans from your backyard. Crazy savings!
Mother Stallard and Trail of Tears Beans

Plus, beans are just so gosh darn beautiful. The process of planting,  harvesting, picking, and then storing them entertains and tickles all of our senses. Luckily, we have beautiful Christmas Lima beans yet to harvest.

Next, we cut Swiss Chard. We'd been waiting to make a big harvest until a frost hit. In cold weather, some vegetables respond by producing more sugar because sugar doesn't freeze;  hence, the veggies are a bit sweeter. It's worth noting though, that a freeze will kill Swiss Chard, so the whole sugar thing doesn't work beyond a certain point.

This  morning, I froze 2 bags of our Swiss Chard and 2 bags of Harmony Valley Farm's spinach. If you haven't ever frozen greens before, it's super easy and well worth your time. Simply rinse the greens, chop them to desired size, and put them in boiling water for 2-3 minutes. Then, put them into an ice bath to stop the cooking process, dry them (in salad spinner or by squeezing and draining), and then bag them up. I find we actually eat more greens in the winter because taking them out of the freezer and heating them up or adding them to a soup or casserole is so quick! 

I also stuck a bunch of dry curly kale into bags. No need to blanch! Kale crumbles are the perfect easy addition to winter dishes.
Nutrition for the winter

And now, we're off to the garden. Happy Fall!


Sunday, October 9, 2011

Green Bugs!!...Help!

Because of the bug invasion, most of our Oaxacan green dent corn looks like this.
  All summer long, we were plagued by a tiny flourescent green bug. Many of our squash plants were eaten, our corn kernels devoured, and today, we discovered our sunflower seeds were gone too. Does anyone have any idea what could be the culprit? I've tried taking pictures of the insect to post, but none have turned out.


Here, however, is what it has done to all of our corn and our sunflowers.
All of kernels are empty. Tiny holes cover them all; the little bugs made their way in and ate the seeds.

Last year, the same thing happened.
 We've heard corn is super easy to grow, but we've had little luck. Each year, the green bugs are back. We're hoping to identify them soon, so that we can figure out how to get rid of these pests. Until then, the chickens are enjoying and benefiting from our failed attempts. If you've had a similar experience or know of a remedy, please do tell!

Sunday, October 2, 2011

Stealing from Squirrels: Harvesting Black Walnuts

Today's harvest
We moved into a house on a one-acre plot of land and were lucky enough to inherit five full-grown black walnut trees. Our first  year here, we didn't realize our fortune and probably just complained about the slipperiness over which we had to mow in the fall. I remember almost falling with the lawn mower more than once! The next summer, our longtime friend Jack pointed out that we had ourselves some monstrous black walnut trees. Our inner hunter-gather selves sparked with curiosity. We had to wait for the following fall, as black walnut trees produce a ton of fruit every other year. So, wait we did. The following year, we picked a few buckets and let them sit on the porch. Carried away with other gardening endeavors, work, and being social, we ended up providing squirrels with some easy dining that winter, but didn't try any ourselves.

Today, we finally, finally made the Gatherer part of our psyche deliriously giddy! We spent the day collecting, hulling, and washing black walnuts. I started off with a pair of gardening gloves - not a good idea.
Tomorrow, my students will be wondering if I have touched a horcrux like the late Dumbledore. I guess the dye doesn't come off of your skin for quite some time, so instead of toting a "green thumb", I'll be showing off my brown one. Luckily, I discovered the black walnut juices were seeping through early enough in the process that it is not as bad as it could be. I replaced them with yellow, plastic cleaning gloves after about 5 of the walnuts.

We learned a few tidbits during our research today:
1. You don't have to wait until black walnuts are black to harvest them. In fact, pick them when they're green. They're much less likely to be filled with little white maggoty-looking worms.
2. You don't have to stuff them into a bag and then back over them with your car. In fact, several walnut experts report that doing that equals danger. Walnut pieces could bust off, break windows, hit animals, and so on. No good. Through trial and error, we found the best way to hull them is to stomp on them with the heel of your shoe, and then peel the green husk off. The stomping sped up the process quite a bit.
The pretty peach inside quickly turns black once the air hits.

3. You have to rinse them off - but they won't come completely clean. Get what you can off without completely stressing yourself out.

4. The walnuts have to cure for about 2 weeks before you can take the nut shells off.
5. The black walnut juice/dye is toxic to dogs and VERY toxic to horses. Keep your canine friends on a short leash or in the house when doing the dirty work.
Franklin expressing his non-gratitude re. the short leash


So, for now, we're waiting...we might harvest some more in the meantime. I never realized how many "walnut" foods I loved until I began this whole walnut fiasco this morning. I'm anxiously awaiting making homemade walnut burgers. Andy can't wait to make chocolate chip walnut cookies. And tonight I read about black walnut ice cream.

Brown fingers and all, I think I am foreseeing myself back out in the yard tomorrow, picking some more. Poor squirrels. I almost feel guilty. I guess I'll leave them all of the cracked ones. That should be good enough, right?


Sunday, September 18, 2011

A Produce Plus Weekend: Sweet Peppers, Edamames, and Cucumbers


We spent the better part of our weekend in the kitchen. But, as I've written before, spending time in the kitchen with a large glass of wine and some good tunes with the one I love is a beautiful thing. So, what did we make? Well...

On Friday, Andy brought home a large pail of cucumbers from his colleague. What a generous lady! We decided to make those in the crock like we did earlier this year. The recipe for that is here. Our first batch is in the fridge, and the pickles are wonderfully crunchy. So, we figured why veer away from a good recipe? (Well, other than the fact that our fridge is very near capacity...we really need a second one to store all of this live food we've been creating.)

On Saturday morning, we picked up 5 pounds of mini sweet peppers and 10 pounds of edamame from the Harmony Valley Farm stand at the Farmers' Market. Juan happily handed us our boxes in return for our check. We love produce plus opportunities ~ they always lend themselves to weekends in the kitchen, preserving up food for the winter, but we are relishing the day when our gardening skills are so fierce that we won't even be tempted to order and pay for produce plus. We look forward to the day when we're swimming in tons of tomatoes and crowded out of the house by piles of edamames and peppers. But until then, produce plus is a perfect way to support a local, sustainable grower, while making an effort to eat  both seasonally and locally.

Funny thing about this week's produce plus pepper purchase is that we had no idea what we'd do with the sweet peppers once we got them. When we received the email that for the first time ever, these mini bursts of goodness were for sale in huge increments, we leaped at the chance. We began receiving these in our box about two years ago, and since then, they're one item we can't seem to tire of. As the summer winds down, at least there are mini-sweet peppers!. Honestly, they are mouth-poppingly delicious. Andy and I both eat them raw, plain or stuffed with cheese. So, what to do with 5 lbs of them? We tossed around roasting and freezing some, just freezing others, pickling them, making them into jelly, or even candying them. But then, this week's CSA newsletter featured mini sweets and provided a recipe for sweet pepper marmalade, and we were sold on that idea. The cans of red, yellow, and orange sweetness are gorgeous, and we're looking forward to sharing some over the holidays. The newsletter suggested serving with pretzels or crackers and cream cheese or goat cheese. Don't those ideas sound absolutely delicious?

...oh...and about that gardening goal, we saved a ton of sweet pepper seeds.

And, as for the ten pounds of edamame, simple! We blanched them (in shells) for three minutes, put them in a water bath, divided them up into freezer bags (2 cups per bag) and froze them. How great will an edamame salad be in the middle of a Wisconsin winter? So good. I'm already planning out my day of "summer eating" on a negative degree day: frozen watermelon juice-vodka drinks, edamame salad, and grilled veggie burgers perhaps?  I think I need to start getting bikini-ready for that fun day inside the confines of my cozy home now.

Here is the recipe we used (courtesy of Harmony Valley Farm) for the pepper marmalade:

1 cup sweet peppers, small dice
1 cup onion, small dice
1 cup sugar
1/3 cup white distilled vinegar
1/3 cup apple cider vinegar
1/4-1/2 tsp chili flake

Combine all ingredients in a medium saute pan.

Simmer over medium heat for 5 minutes. Reduce heat and simmer another 20 minutes or until liquid is syrupy. You can store in the fridge for several weeks or can and process 10 minutes in a hot water bath.


Our weekend totals are:
1 crock full of pickles
approx. 6 pints of sweet pepper marmalade (1/2 quart for the fridge)
17 frozen cups of edamame


Tuesday, September 6, 2011

Homemade Hot Sauce!

Cayanne, Seranno, Joe's Round (missing jalapeno)
We're addicted to hot sauce. We like hot sauce on our eggs. We like hot sauce on our potatoes. We like hot sauce on our burgers/veggie burgers.We like hot sauce on our popcorn. Aside from desserts, we like hot sauce on just about everything. So, as you can imagine, making our own has come to mind.

A few years ago, we made a sort of buffalo-type hot sauce. Of course, that was before this blog, so we can't remember how we managed that at all. I do remember that it was fabulous over some oven-baked potatoes, sprinkled with blue cheese.

This year, we're trying the old-fashioned pepper fermentation method. Included are a lot of Cayenne peppers (thanks to Andy's colleague!), Joe's rounds (super hot!), jalapenos, and Serrano peppers. They're mashed up and fermenting as we speak. In fact, they've been fermenting since Saturday.

To do this, we simply (and with gloves on!):

1. removed the stems.
2. put all of the peppers in the Cuisinart
3. added salt (1.5 teaspoon per cup of mashed peppers)

4. put the mash in a Ball jar (though you could use a crock or a food-safe plastic container)
5. weighed down the mash with another jar, and
6. covered the whole operation with a towel

...and now we'll wait for a month or more for the flavor to develop. Throughout this process, we have to make sure that the liquid covers the mash; it's a crucial part of the fermentation process. If there is not enough liquid to cover the mash, we'll add salted water.

Soon, we'll be left with hot sauce to put into a bottle or two and store in the fridge.

I can't wait! I'm sure whatever I make for dinner the day it's ready will be a perfect meal for hot sauce.

Monday, September 5, 2011

Tomato Flops: Perfect for Pizza

We are in love with our dehydrator. Slice produce up, season it (or not), and place it all on trays. Turn the dehydrator on, slide the trays in, and forget about it. Half a day later, poof! Dehydrated, preserved garden goodies.

One example is what we call Tomato Flops. We got this idea from The Genius: Mrs. Barbara Kingsolver's book Animal, Vegetable, Miracle, but have adapted it over the past few years to our own liking. These flops are stupendous on pizza in the winter. They pop like little bursts of summer in your mouth!

Here's how we made ours:

Ingredients:
Roma Tomatoes
Dried Italian herbs (Oregano, Basil, Parsley, Savory, Thyme, etc...)
Garlic (if desired)

Process:
1. Slice Roma tomatoes in half. 
2. Sprinkle with desired amount of herbs. Top with a very thin slice of garlic, if you enjoy that sort of thing. We did one tray with garlic and herbs, but the rest were just covered with herbs.
3. Dehydrate until desired consistency. We recommend not completely dehydrating them. We let ours go about 12 hours.
4. Since we don't dry them completely, we freeze them in bags for winter use.

Last weekend, we froze 10 bags, with a dozen flops each. They're piled in the freezer, waiting to bring us a bit of sunshine in the middle of our Wisconsin Winter.

Before

After

Monday, August 29, 2011

Carrots: Spicy Pickles, Pesto, and More

Carrots test our patience as gardeners. Their germination time is long, and weeding them is a pain! I can never tell what's a carrot and what's a weed at the start of the season. But then, the parsley-like leaves begin to develop, and these sweet, orange Popsicle-like roots take form under ground. Once the foliage begins to identify itself, I feel I'm golden. All I have to do is wait a good 2-3 months, and soon, I am digging up loads of carrots.

This year, we had our first successful crop of Danvers Carrots. We planted them in a raised bed which helped tremendously in terms of weed control. To get them out of the ground without breaking them, we saturated the dirt around them with water and pried them up with a shovel.  We harvested about 5 lbs. Then, the question was: what should we do with all of them? We also had another pound from my parents' and our CSA boxes.

We thought about juicing them...but then realized how quickly said juice would be consumed in comparison to the amount of patience exuded to grow and harvest them. We thought about pickling them all, but realized we still had 1.5 jars from last year's canning season. So, we decided to pickle most and freeze some. We also used the greens to make carrot-top pesto.

In the end, we canned four quarts and froze three quarts. We used the same recipe that we used last year, except that instead of guallijo peppers, we used chipotles and dried super hots. And again, we sliced them into rounds versus into spears.
 We also froze four bags (2/3 cup each) of carrot-top pesto. Apparently, carrot tops have a ton of Vitamin K and chlorophyll~ much more than carrots themselves. People drink carrot top tea (sweetened with honey) as a way to quickly get all the nutrients. We thought about drying ours for tea, but decided we'd probably be more likely to eat them up if they were on pizza ~ hence, carrot top pesto.

Use all in varying amounts to your taste (and freeze for the winter, if you'd like!):
Carrot tops (chopped)
garlic
walnuts or pine nuts
Parmesan cheese
salt and pepper
honey
olive oil

Put in a food processor and mix to desired consistency. It's that simple.

Sunday, August 28, 2011

Livin' in the Kitch'n

The end of August=bustle, bustle, bustle. Of course, the garden is at its peak right when work is at its most stressful time, right?  Luckily for me, I feel comfortable and happy, alongside my cooking partner/husband in a hot, steamy kitchen with loads of bubbling pots, a whistling water canner, the smell of vinegar and vegetables, and pets running rampant.

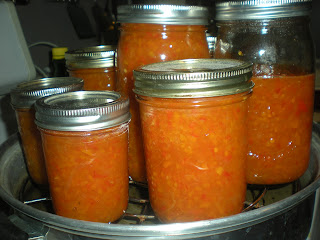
Last Saturday, we made pizza sauce. We loved the recipe we used from Barbara Kingsolver's Animal, Vegetable, Miracle so much last year that we used it again this year. We cooked down 25 lbs. of Roma tomatoes and ended up with 10 pints of pizza sauce. Our only change to last year's process is that we used a bit less cinnamon, and we cooked it down a bit more, so we ended up with less pints, but thicker sauce.

Also, we processed  25 lbs. of Romas into 8 quarts of canned diced tomatoes. These are spectacular to have in the pantry for everything from spaghetti to soups to pizzas in the fall and winter. Last year's lasted us through this May. We'll have to can more to make that happen again this year. 

And, we have more cabbage fermenting right now. This time, the crock is full! I think we'll be kraut-ready this fall and winter. Bring on the Ruebens and Ritz crackers!

Plus, the freezer is receiving the fruits of our labor. This week, I froze carrots, celery, and green peppers.

Tomorrow is beet day!  Stay tuned...