Pin It

Showing posts with label fruit. Show all posts

Sunday, December 23, 2012

Date Balls

Yesterday, in my blog post about chocolate-covered peanut butter balls, I mentioned that I don't get too into baking for the holidays. Yet, here I am, about to write about another holiday sweet. Today's delight is a bit healthier. It's entirely vegan and raw. I'm writing about date balls!

Medjool dates arrive to our house every year in our CSA box, and often, I don't know what to do with them. They are deliciously sweet and are packed with nutrients (weight for weight more potassium than bananas,  full of fiber, good B-12 complex vitamins...and fat-free), but their caloric make-up is high (65 per one Medjool date). A recipe for Date Balls came with our CSA box this week, and since we're on a running kick in our house, the timing for this recipe seemed perfect. Plus, what a wonderfully healthy addition to the holiday sweet table. Leftovers from there will serve as energy boosts before some big runs or snowshoe adventures in the upcoming weeks.

The recipe couldn't be simpler, and the amount of ingredients is small. Most of the ingredients cannot be bought locally here in Wisconsin, but dates and oranges are in season right now in other places.

Ingredients
1.5 cups of pitted dates
1/4 cup of shredded coconut
3 Tbs. of cocoa powder
optional: 1 tsp. of espresso powder
optional: 1 tsp. of orange zest  

To cover date balls, you could just use one of these or you could make a variety:
coconut flakes
toasted sesame seeds
toasted and finely chopped hazelnuts
toasted and finely chopped pistachios
...and I tried Eden Organic Seaweed Gomasio (Sesame Seeds, Seaweed, & Sea Salt) for some of the balls

Directions:
1. Pit the dates.

2. Mix the pitted dates, the 1/4 cup of coconut, the cocoa powder, and the optional ingredients (if you're using them) in a food processor. Mix until the mixture forms into a ball. If it is too dry, add a teaspoon of water at a time. If it is too wet, add more coconut.

3. Put the date ball coverings into their own bowls.
 
Form 1-inch or smaller balls of the date mixture in your hand, and then roll them in the desired coverings. I got creative here and did some simple, one-covering balls and some mixed.
4. Refrigerate.


Thursday, June 21, 2012

Happy Summer Solstice!


Little Bear, all decked out
 Bonfires. Singing and dancing. Drum circles. Trekking to Stonehenge to join in chants of "All Hail the Sun!" All common ways to celebrate the summer solstice, but slush and dogs? 

Slush and dogs is exactly how our newly-made dog park family decided to celebrate the day of birth, sunlight, growth, and joy: the summer solstice. Our dogs played fetch, while we sipped slush, conversed, and even sang a few tunes.


Dogs enjoying dog slush

The slush was really the star of the show. People got creative. The slush menu included brandy slush, watermelon slush, a banana-berry mix slush, a slush for the doggies (made of Braunschweiger and milk), and our rhubarb-strawberry slush. Turns out making slush is pretty easy, and when we returned from the festivities, we made a peach-pluot slush.


Peach-pluot slush


To make this summer slush concoction for yourself, you need the following:

  •  8 cups water
  • 4 cups fruit (or to taste)
  • 2 packages of gelatin
  • 1/2 cup lemon juice
  • 1.5 cups of sugar (or to taste)
  • vodka to taste
  • 7-up to taste


Instructions:
1. Boil water with fruit until fruit turns to mush. Lower heat.

2. Scoop out mush (and save it for breakfast fruit, to add to yogurt, or to give to your chickens!)
3. Return water to boil.  Add sugar and gelatin.  Boil until sugar and gelatin are dissolved. Remove from heat and cool.
4. Add vodka and freeze. We started with 2 cups of vodka, but you could easily add more or less, if desired.
To serve: scoop out desired amount into cup. Top off with 7-up or like soda.

My friend Jennie and I also made dog treats for our best friends.
Za tries to take his treats early

Jennie received the recipes from a friend, and the dogs LOVED them. Here they are:

Cheese And Garlic Dog Cookies :
• 1 1/2 cups whole wheat flour
• 1 1/4 cups cheddar cheese --grated
• 1/4 pound margarine -- corn oil
• 1 clove garlic --crushed
• 1 Pinch salt
Cream the cheese with the softened margarine, garlic, salt, and flour. Add enough milk to form into a ball. Chill for 1/2 hour. Roll onto floured board. Cut into shapes and bake at 375 for 15 minutes or until slightly brown, and firm.
MAKES 2 to 3 dozen, depending on size.

Peanut Butter Puppy Poppers :
• 2 cups whole-wheat flour
• 1 tbsp. baking powder
•1 cup peanut butter
• 1 cup milk
Preheat oven to 375 F. In a bowl, combine flour and baking powder. In another bowl, mix peanut butter and milk, and then add to dry ingredients and mix well. Place dough on a lightly-floured surface and knead. Roll dough to 1/4 inch thickness and use a cookie cutter to cut out shapes (actually we just made them into balls and pressed them with a fork, like peanut butter cookies). Bake for 20 minutes on a greased baking sheet until lightly brown. Cool on a rack. Store in an airtight container.


Monday, April 2, 2012

Berry Blast: Aronia, Honeyberry, Hardy Kiwi, and Elderberry Plantings

Aronia flowers today
Our bees will soon arrive and will they have plenty to pollinate!  An early spring jump-started our annual trip to Jung's Garden Center, and we had pre-ordered 10 aronia plants from Bellbrook Berry Farm in Brooklyn, Wisconsin, so the yard is buzzing with young fruit plants (pun intended).

To start with, we planted one more rhubarb plant. We've planted one every summer minus one since we've resided here, so we're up to four. We find new and exciting recipes for rhubarb every year and never feel we have the adequate amount come springtime, so who knows, maybe we'll end up with a real rhubarb patch in a few years.

Rhubarb, from youngest to oldest


We also added one hardy kiwi plant. One of ours seemed a little weak after snow and cold this winter, so we'll either end up with three like we intended, or get the gift of a fourth. These guys will soon be trellised up poles that lead to a bat house. More to come on that soon.
Our youngest kiwi plant
Sporadically, we bought four elderberry canes. We couldn't help ourselves. On the way to Jung's, I found this recipe, and with spring fever overwhelming both of us, elderberry canes sounded like something we absolutely had to have. Granted, this recipe is written for the elder tree berries, but we figure both should work just fine.
Elderberry canes
Honeyberry plants also caught our eye, so yes, we planted two of those as well. Honeyberry plants can tolerate extremely cold temperatures, and their flavor is often compared to blueberries, which we cannot successfully grow due to our soil. Plus, they are blue, and blue fruits are known super fruits.
Honeyberry plants, wrapped up due to some neighboring feral cats who like to dig these up


8 of the 10 plants
Finally, the aronia....planting aronia was a mission this year. Weekly, we find ourselves ordering fresh juice smoothies with added aronia from the co-op. No one really sells the fruit anywhere other than if you're ordering food to-go. Aronia has caught a lot of buzz lately as a super-fruit because it contains more antioxidants than other super fruits such as blueberries. Plus, aronia grows easily in a variety of conditions ~ from sandy to clay, from cold to warm. Each bush is said to produce between 20 to 30 pounds of fruit annually. And a bonus, the plants are beautiful. In the spring, they flourish with white flowers, and in the fall, they wear a dark crimson. We purchased two-year-old plants, so we'll be picking fruit this fall!

With all of our super fruits, it is just a matter of time before we become super humans, right?

Sunday, October 2, 2011

Stealing from Squirrels: Harvesting Black Walnuts

Today's harvest
We moved into a house on a one-acre plot of land and were lucky enough to inherit five full-grown black walnut trees. Our first  year here, we didn't realize our fortune and probably just complained about the slipperiness over which we had to mow in the fall. I remember almost falling with the lawn mower more than once! The next summer, our longtime friend Jack pointed out that we had ourselves some monstrous black walnut trees. Our inner hunter-gather selves sparked with curiosity. We had to wait for the following fall, as black walnut trees produce a ton of fruit every other year. So, wait we did. The following year, we picked a few buckets and let them sit on the porch. Carried away with other gardening endeavors, work, and being social, we ended up providing squirrels with some easy dining that winter, but didn't try any ourselves.

Today, we finally, finally made the Gatherer part of our psyche deliriously giddy! We spent the day collecting, hulling, and washing black walnuts. I started off with a pair of gardening gloves - not a good idea.
Tomorrow, my students will be wondering if I have touched a horcrux like the late Dumbledore. I guess the dye doesn't come off of your skin for quite some time, so instead of toting a "green thumb", I'll be showing off my brown one. Luckily, I discovered the black walnut juices were seeping through early enough in the process that it is not as bad as it could be. I replaced them with yellow, plastic cleaning gloves after about 5 of the walnuts.

We learned a few tidbits during our research today:
1. You don't have to wait until black walnuts are black to harvest them. In fact, pick them when they're green. They're much less likely to be filled with little white maggoty-looking worms.
2. You don't have to stuff them into a bag and then back over them with your car. In fact, several walnut experts report that doing that equals danger. Walnut pieces could bust off, break windows, hit animals, and so on. No good. Through trial and error, we found the best way to hull them is to stomp on them with the heel of your shoe, and then peel the green husk off. The stomping sped up the process quite a bit.
The pretty peach inside quickly turns black once the air hits.

3. You have to rinse them off - but they won't come completely clean. Get what you can off without completely stressing yourself out.

4. The walnuts have to cure for about 2 weeks before you can take the nut shells off.
5. The black walnut juice/dye is toxic to dogs and VERY toxic to horses. Keep your canine friends on a short leash or in the house when doing the dirty work.
Franklin expressing his non-gratitude re. the short leash


So, for now, we're waiting...we might harvest some more in the meantime. I never realized how many "walnut" foods I loved until I began this whole walnut fiasco this morning. I'm anxiously awaiting making homemade walnut burgers. Andy can't wait to make chocolate chip walnut cookies. And tonight I read about black walnut ice cream.

Brown fingers and all, I think I am foreseeing myself back out in the yard tomorrow, picking some more. Poor squirrels. I almost feel guilty. I guess I'll leave them all of the cracked ones. That should be good enough, right?


Monday, June 20, 2011

Pineapple Salsa

We got a pineapple in our first fruit CSA box of the season! In a few nights, we're having the Poquettes over to celebrate a belated Father's Day. How do these two random sentences relate? GRILLED PINEAPPLE SALSA  for said get-together.We'll be serving these up with some tortilla chips before dinner. Huge yum factor!

Here's what we used:
pineapple, cored and cut into chunks
chili powder, to taste
2 garlic scapes
1 can of fire-roasted tomatoes (we used our last one!!! ...but you can also buy similar items at the store)
1/2 red onion, diced
1/2 bunch of cilantro
juice of one lime

How we made it:
1. Sprinkle chili powder onto pineapple chunks and put into a grill pan. Grill over hot coals, tossing frequently. Do this until pineapple is soft.
2. Drain tomatoes and dice. Also, dice pineapple chunks.
3. Combine all ingredients and season to taste. Refrigerate. Let sit overnight if possible so that the flavors have a chance to meld together.


Sunday, October 24, 2010

Therapy in the Kitchen: Squash and Pear Soup, plus Plout-Apple Crisp


Life has been a roller coaster lately, and so dining out has been plentiful as have homemade goodies baked for us by our friends. Today we realized our refrigerator was busting with food, ready to vomit out bags of veggies and fruit at its first opening. Our little feather-footed Bantam, Ani, died this morning, and so, we decided to go to therapy ~ cooking together, side-by-side, in perfect matrimonial harmony in the kitchen, whipping up soup for the freezer, applesauce for later this winter, and freezing veggies we realized we wouldn't get to eating fresh this week. Oh - and we added to our dessert collection ~ a fresh pluot and apple crisp.

Below, I have included the recipes for a Squash Pear Soup and our Pluot and Apple Crisp. 

Squash Pear Soup
 (we have adapted this from Deborah Madison's recipe in Vegetable Soups from Deborah Madison's Kitchen.)

Ingredients:
5 cups of squash
5 pears
3 Tbs. of butter
10 cups of vegetable stock
1 medium onion
1/2 cup of good, white wine
2 inches of ginger, grated
a generous pinch of cinnamon

1. Cut the squash in half. Remove and save the seeds and guts.  Roast the halved squash and peeled pears at 425 degrees on a baking dish or roasting pan. If squash are dry, add a bit of water to the pan. Brush with oil and season with salt. Bake for about 1 hour. You may have to turn the pieces over once or twice.
2. Once the squash is roasted, scrape off the skin and add it to saved seeds and guts.Also, reserve the liquid in the roasting pan.
Making stock
3. To make a stock, bring the 10 cups of water to a boil. Add the seeds, guts, and skin. Add the ginger and a 1/2 teaspoon of salt. Bring to a boil, lower to a simmer, and cover for 20 to 25 minutes. Strain and save liquid.
4. Then, melt the butter in your soup pot. Add the onion and saute over medium-low for about 10 minutes. Add the pears, squash, stock, and the reserved liquid from the roasting pan. Bring to a boil and then lower the heat and simmer for 25 minutes. Puree all when finished.

We froze ours, but it's delicious right off the stove as well!

Nutrition Facts
cup servings
Squash and pear soup
Serving Size: 1 serving
Amount Per Serving
Calories111
Total Fat2.9g
      Saturated Fat1.4g
      Trans Fat0g
Cholesterol7mg
Sodium136mg
Carbohydrate20.4g
      Dietary Fiber4.2g
      Sugars9.8g
Protein0.9g
Alcohol0.9g
Vitamin A 121%Vitamin C 27%
Calcium    6%Iron 5%
__________________________________
Plout and Apple Crisp
Ingredients:
4 apples, sliced
8 pluots, diced
6 Tbs. brown sugar
3/4 cups flour
1 tsp cinnamon
4 Tbs. oats
4 Tbs. coconut (optional)
6 Tbs. butter
1/3 cup brown sugar

Directions:
1.  Put the apples and 1/2 of the sugar in a saucepan. Cook over medium heat for 10 minutes or until apples are soft.
2. Put the pluots in the baking dish. Then, add the apples.
3. Combine the flour, cinnamon, oats, butter, and the rest of the sugar. Blend until the mixture is crumbly.
4. Put the mixture over the apples. Then, sprinkle the brown sugar and coconut on top.
5. Bake at 400 degrees for approximately 30 minutes. To be safe, put the baking dish on top of foil or a cookie sheet in case the fruit spills over.

Oh~ and no fall-cooking day would be complete without applesauce! We froze a few bags of that too!
Ready to cook down.

Saturday, September 18, 2010

Viva Mexico with Applesauce? . . . and Locavores Like Local Apples

On Tuesday evening, Andy and I ventured to the Door Creek Orchard in Cottage Grove. What a lovely place! Sheep, a beautiful apple orchard, and a quaint country store. We will be heading back! 

The purpose of our after-school detour was twofold. On Wednesday, my colleague, Carol Samuel, and I were hosting our first LOCAVORE meeting at school. We basically wanted to bribe students to come with food, so I bought a bag of freshly-picked Gala apples. On Thursday, my students and I were having a little fiesta in celebration of La Independenica de Mexico. My classes are very multi-cultural this year, so we decided that the celebration should include cultural food. What's more American than homemade apple pie? Freshly-made applesauce!

Wednesday's first club meeting went well. Though we only had a few students, they were ENTHUSIASTIC students with very innovative and exciting ideas, including holding an after-school workshop to teach other students how to make their own compost bins. We  have a PR plan for the rest of the month to recruit more members. If any of you have ever started a new club, please send suggestions my way!

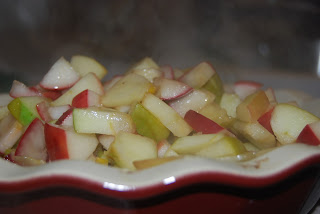
Wednesday evening, I came home and made applesauce for Thursday's Mexican fiesta. I had bought a 20 pound bag of McIntosh apples for this, but I added a few other kinds of apples that were tucked away in my fridge.

I don't peel my apples for sauce. Why get rid of important fiber and other nutrients?

Ingredients:
apples
water
sugar to taste
cinnamon

Instructions:
1. Core apples and cut into wedges.
2. Put into a large pot on medium-low heat.
3. Add a bit of water to keep the apples moist.
4. Add cinnamon and sugar to taste.
5. Cook until apples break down to your desired consistency.

For a delectable treat, serve a dish warm with a splash of heavy whipping cream or half and half.

Or refrigerate and serve cold. Of course, freeze the extras!

...and if you have chickens or have neighbors who have chickens, the cores are an especially appreciated chicken treat. Our flock clucked and cooed in excitement.