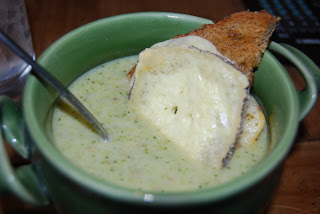
Our Harmony Valley cheese share is biweekly for much of the year, but as vegetable peak season closes, our CSA schedule fluctuates, so we received cheese two weeks in a row. Another reason for the increase in creamy, gooey, cheesy recipes.
This soup is another from Vegetable Soups from Deborah Madison's Kitchen. I have to say that the finished product was the best Cheese and Broccoli soup I've ever had.
Ingredients:
1 1/2 pounds broccoli
sea salt and ground pepper
3 Tbs. butter
1 onion
1 celery stalk
1/2 pound of diced potatoes, peeled unless organic
1 garlic clove
1/8 tsp. cayenne pepper
1 tsp. marjoram, 1 bay leaf, 1 pinch of dried thyme
1 Tbs. flour
1/2 cup cup cream
2 tsp. Dijon-style mustard
2 cups grated cheddar cheese
rye or whole wheat bread, toasted
Instructions:
1. Chop the broccoli trees. Cook the florets in boiling water for about 3 minutes. Drain and reserve the liquid. Rinse broccoli florets under cool water and set aside.
 2. Melt the butter in a soup pot. Add onion, potato, celery, broccoli stems, garlic, herbs, and cayenne pepper. Cook over medium-high heat for about five minutes, stirring occasionally. Add 1/2 tsp. salt, flour, and 3 cups of reserved water from the broccoli (saving any extra). Bring to a boil, lower the heat, and simmer, covered, until the potato is tender (about 10-12 minutes). Add cream and/or additional broccoli water to thin the soup. During the last few minutes, add the florets.
 3. Remove the bay leaf, puree the soup, and return it to the pot. Stir in the mustard, and add pepper and salt to taste. Just before serving, add the cheese. Do not allow the cheese to boil. Serve with toast.
We melted a slice of mild sheep cheese on our toast...because we didn't think we had enough cheese yet this week! :)


