Pin It

Tuesday, October 20, 2009

Planting in the Dark: Garlic


As the days get shorter and work gets more demanding, finding time to live sustainably undoubtedly becomes more challenging. However, one must fight on and prevail. The rewards are just that much sweeter.

Because only Monday and Tuesday of this week were forecast without rain, we needed to use any spare time possible to get next spring's garlic in the ground. Getting cloves planted before the soil freezes is imperative, so we knew it was now or never. As much as our lazy tendencies screamed at us to stay inside enjoying the warmth of the house, we knew we'd be disappointed if we missed the window to plant the garlic and were left to survive on the few cloves per week we get in our CSA box next spring.

Garlic planted in the fall produces much larger heads then garlic planted in the early spring, and when Andy and I think of the perfect garlic head, we think of gigantic heads with cloves the size of silver dollars! So, Andy canceled after-work plans yesterday to till up the garden, and then plant 26 organic, locally-grown cloves. He spaced them 4" to 6" apart with 1" to 2" of soil covering the cloves. We planted our garlic in a very sunny part of the garden, in soil that is well-draining and not stony ~ all important ingredients for big, robust heads of spicy goodness next spring!

Tonight, not getting home until after dark, we had quite a riot insulating and covering our garlic in the dark. We live in a climate where winter temperatures frequently drop below 0 degrees, so we always mulch 3-4 inches. Last year, we used dried leaves, but this year, we were fortunate enough to stumble upon enough free straw. The cool breeze outside and the satisfaction that our little bulbs of perfection were safe from the deep freeze of winter inspired a bit of our own warmth inside: a cup of the chamomile tea which we harvested this summer! Yum!

Spring seems so far off right now, but when the time comes, there is nothing quite like seeing those first little bursts of green, reaching towards the sun, letting you know fresh garden eating and days soaking up the sun are right around the corner. These nights in the dark planting with flashlights, jackets, and the need for a warm cup of tea are no price for the feeling of cutting the first garlic scapes of the season or slicing the spring's first fresh garlic cloves!
All planted and waiting for insulation.
Mulching in the dark!

Sunday, October 18, 2009

Working with Live Cultures: Homemade Yogurt


Two years ago, while exploring the Viroqua Co-op's amazing book section, we stumbled upon a gem: Sandor Ellix Katz's Wild Fermentation. Since then, both Andy and I have read it cover to cover, enjoying the exciting philosophical food discussions and the innovative and classic fermentation recipes.

Among the sauerkraut, pickles, and kimchi recipes is the classic yogurt recipe. We experimented with the book's directions, but over time, have come to develop our own methods to achieving super creamy, fabulously delicious, and perfectly smooth homemade yogurt.

So what is yogurt anyway?

Yogurt is milk or cream that has been fermented with a good, live bacteria at a consistently warm temperature. Yogurt is a nourishing food with many health benefits: it provides calcium which makes bones stronger, prevents both yeast infections and urinary tract infections, and it provides the body with vitamin B2, which can be somewhat difficult for vegetarians to obtain.

And why make your own yogurt?

Well, for one, making anything by yourself makes you more self-sufficient and is more sustainable. And two, by making your own yogurt, you're able to control how much fat the yogurt contains and you're able to support local dairy farms by purchasing their milk or cream. We use Blue Marble Farm's Milk (Barneveld, WI) or Sassy Cow Creamery's Milk (Columbus, WI). Depending on our mood and for what we will use our yogurt, we use 2%, whole milk, or sometimes a combination of the two.

Homemade Yogurt

Ingredients:
1 quart of milk
1 Tbs. of yogurt starter (take a Tbs of your favorite plain yogurt: be sure it contains live cultures)

1. Heat a quart of milk in a heavy pot until it starts to foam, but not boil (180 degrees F). Use gentle heat, and stir frequently to avoid burning the milk.
2. Remove from heat. Cool to 110 degrees F.
3. Mix in starter yogurt.
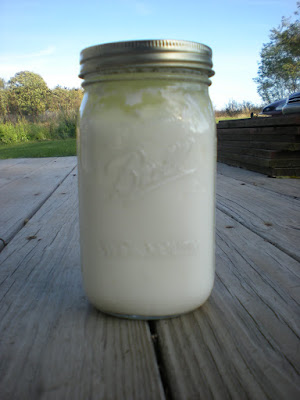
4. Pour into sterilized jar(s), and cap it/them.
5. Place jars in an insulated container, filled with water. We like to use an old fish aquarium with insulation wrapped around the outside. To heat our tank, we use hot water and a submersible heater. Other people we know use a cooler. No matter what you use, the water must be consistently around 100 degrees.
6. Check yogurt after 8 to 12 hours. It should have a tangy flavor and some thickness.
7. Refrigerate when done.

Heating up the milk.
Cooling it off.
Yogurt Starter
Our insulated contraption.
Keeping them consistently warm.

Morning Breakfast with Homemade Yogurt

1/3 cup Nature's Bakery Peanut Butter Granola (or granola of your choice!)
1/4 cup of yogurt
1/2 cup of plain, unsweetened hemp milk
seasonal, fresh fruit (or frozen and thawed in the winter!)

Mix yogurt and hemp milk until the consistency is completely smooth. Add the granola. Chop in the fresh fruit, and voila ~ the best breakfast around!

Monday, September 28, 2009

A Weekend of Affirmation

This weekend, Andy and I took a much-needed break from the steam of the pressure cooker and ventured to the Food for Thought Festival in Madison on Saturday and then to the Harvest Party at Harmony Valley in Viroqua on Sunday. Both days were reaffirming, exciting, and inspirational to both of us as we continue forth in our quest to eat more locally and sustainably.

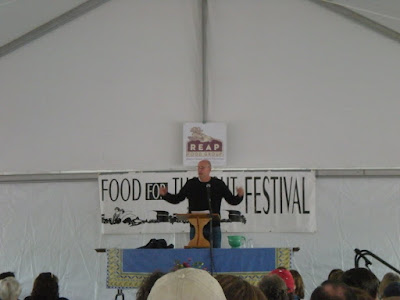
On Saturday, the highlight of the Food for Thought Festival was hearing Michael Pollan speak. Andy and I have both read The Omnivore's Dilemma and In Defense of Food, and in turn, hold Mr. Pollan in high regard. His work and appearances in Food, Inc. solidified our admiration. At the festival he gave a very inspiring speech, describing ways in which consumers can work to make real change happen in food politics.

Among all the facts and inspiration, there were a few tidbits which we found especially striking:
1. Three companies in the United States are producing 85% of the country's beef. Wow.
2. It used to be that it took 1 calorie to produce 2 calories of food; today, it takes 10 calories to produce 1 calorie of food. In Michael Pollan's words, "We are eating oil and spewing green house gas."
3. School lunches need to change. Michael Pollan pointed out that the current lunch program is teaching kids how to eat when it offers them chicken nuggets, tator tots, and juice for lunch with only ten to twenty minutes allowed to consume that lunch. He somewhat comically suggested that kids should earn credit for learning how to eat properly, just like they earn credit for Physical Education.
4. Pollan also joked that the cows in California are happy because they're high on drugs. As a Wisconsin couple who hates the "Happy cows come from California" commercials and all of their hypocrisy, we really appreciated that one.
5. Pollan also pointed out that the food industry has created two problems by taking cows off of the farm and putting them onto feedlots: (1)manure has become toxic with no place to go, and (2) chemical fertilizers are now needed on fields. It used to be that the manure could be used as the fertilizer.
6. It takes 28 ounces of petroleum to produce one Big Mac meal ~ talk about guzzling fuel!
7. Research shows that for every 60 dollars put into a garden, 200 dollars worth of produce is harvested.

The speech was amazing, we felt moved to act, and we even got our books signed!

On Sunday, we drove over to Viroqua, WI to attend Harmony Valley Farm's Harvest Party of 2009. Once there, we hopped on the wagon for a hayride around the fields. Andy and I picked pounds of UW-Roaster peppers to roast and freeze for the winter and an equal amount of jalapenos to be made into hot pepper jelly (very yummy served over cream cheese on a cracker!). Of course, no Harvest Party would be complete without the hunt for the perfect carving pumpkins.

Once back, members enjoyed a pig roast with a potluck of delicious salads, desserts, and cheeses. Harmony Valley also provided Maple Iced Lattes. Wow~ that hit the spot on a crisp fall day!

Hot Peppers!
UW-Roaster Peppers and Sweet Peppers
Can you believe these are Sunchock (Jerusalem Artichoke) plants?
They're over 10 feet tall!
Grazier's Angus Beef (or cute cows for vegetarians!)


Sunday, September 13, 2009

Fettuccine Alfredo with a Summer Twist


A few summers ago, when we had an abundance of fresh veggies and were particularly into grilling them, Andy concocted this Roasted Red Pepper Fettuccine Alfredo recipe. It has become a late summer favorite, which we look forward to all year long! We serve it with another of Andy's creations, Butter-Parsley Bread.

Roasted Red Pepper Fettuccine Alfredo
Sauce:
3 cloves of garlic, minced
2 Tbs. butter
1-2 Tbs. flour
4 cups of 2% or whole milk
4-6 oz. cream cheese
1/2 c. shredded Romano cheese
1/2 c. shredded Parmesan cheese
2 red bell peppers

Other Ingredients:
-various in-season veggies, such as cherry tomatoes, zucchini, broccoli, carrots, etc.
-fresh fettuccine noodles, if possible (We enjoy Madison's RP's Pasta's.)

  • To roast the red peppers, grill over an open fire until pepper skins are black. Put the peppers in a paper bag for 10 minutes. Remove peppers from bag and remove skins. Running them under cold water can aid in this process. Puree roasted red peppers and set aside.

  • Melt butter in saute pan. Add garlic, and saute for about one minute. Add flour. Cook until golden. This is called a roux.
  • Slowly mix in the milk. Heat on medium-high heat until milk begins to boil. Reduce heat. Add cream cheese in cubes. Continue stirring until cream cheese is combined thoroughly. Gradually reduce the heat as you add in the Parmesan and Romano cheese. Once the sauce is of desired thickness, add pureed red pepper.
  • Cover and keep warm while you prepare noodles and roasted veggies.
  • To roast veggies, use a grill pan over an open fire. Shake and drizzle with olive oil. Alternately, saute on stove in a saute pan.
  • To serve, put noodles on plates, followed by sauce, and then top with roasted veggies. Sprinkle parsley and/or Parmesan cheese, if desired.
Butter-Parsley Bread
a loaf of sourdough bread
1 c. parsley (approximate)
1/2 c. shredded Parmesan or Romano
4 Tbs. butter (or more, depending on size of loaf)
3 cloves of garlic (minimum)

  • Cut the bread down the middle, but do not cut all the way through. Then, cut cross ways, making cuts every 1-2 inches.
  • Fill the crevices with butter, garlic, shredded cheese, and parsley.
  • Wrap in foil and bake at 350 until cheese is melted and bread is golden-brown (approximately 30 minutes).


Thursday, August 27, 2009

Slicer Tomatoes: A Slice of Heaven


Despite the cool weather and gossip of a tomato blight this summer , we have had much success with our heirloom slicer tomatoes. We've been juicing them, eating them as appetizers, putting them in salad, and giving them away like hotcakes to keep up. However, we're not looking forward to this stopping; we are quite enjoying ourselves. Moments of quiet and calm are few and far between as the school years picks up. Our tomatoes force us to take a step back and enjoy the outdoors and the remainder of summer.

When we choose tomato seeds, there are a few staples, including Aunt Ruby's German Green Tomato. These are large, beefsteak tomatoes. When they are soft to the touch, they're ready to be picked. We find the taste to be mellow and smooth with sweet accents.

Aunt Ruby's German Green Tomato


Another beefsteak staple is the Brandywine Tomato. Like the name implies, these are rose-colored. Also very large, these make a great slicer to be eaten alone. When we taste-tested all of our tomatoes to compare them last evening, we thought this one had the most intense tomato flavor.

Brandywine Tomato

A new variety that we tried this year, but will definitely become a staple is the Nyagous Tomato. These tomatoes have been blemish-free and perfectly round. They are a deep wine-red color and are very sweet, maybe even a bit smokey, in flavor. Yum!

Nyagous Tomato

Along the same lines as the Nyagous, is the Black from Tula Tomato. These tomatoes look very similar to the Nyagous, and if they were any smaller, they might be confused with the Nyagous. They're a Russian heirloom, meaning that they produce earlier because they have been bred to have a shorter growing season. Very complex flavor. It reminded us of a good wine!

Black from Tula Tomato

Our next tomato variety, we have nicknamed the Packer Tomato. It is the Green Zebra ~ green and yellow, this slightly smaller tomato packs a nice tangy punch! Very refreshing, especially on a hot summer day with a glass of white wine.

Green Zebra Tomato (aka Packer Tomato)

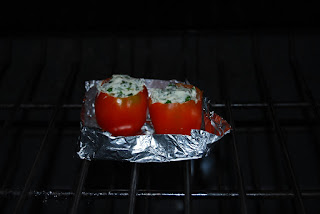
Our last variety, sure to become a staple in our garden, is the Striped Cavern. We bought this variety on a limb, but are so happy that we did. This tomato is perfect for stuffing. We've had quite an adventurous summer, stuffing these with whatever cheeses and herbs we have had available.


Striped Cavern


Cheese- Stuffed Striped Caverns


All of them!

Monday, August 17, 2009

Who is in the Mood for Bloody Marys?

Over the years, we have tried perfecting our Bloody Mary mix, both fresh and canned. Today, I believe we've made our best! We used a juicer to juice the ingredients. Then, we processed 2 quart jars in a water canner for 40 minutes to seal. Before we purchased a juicer, we followed the directions listed below the ingredients.

We had a cup more than two quarts, so we were forced to have a Bloody Mary today (darn!). It was wonderfully creamy and perfectly spicy! We hope we can keep our hands off of the jars until fall!

Pokey's Bloody
30 medium tomatoes, peeled and seeded.
2 green peppers
4-5 large carrots
1 small bunch of celery
1 small onion
4 garlic cloves
1/4 cup parsley
1 bay leaf
1/4 cup sugar
1/4 cup lemon juice
1.5 Tbs. salt
1 Tbs. Worcestershire sauce
hot sauce to taste

Chop all vegetables. Cook peppers, carrots, celery, onion, garlic cloves, parsley, and bay leaf in a large pot until veggies are soft, approximately 40 minutes. Take out the bay leaf. In batches, blend vegetable mixture in a food processor or blender. Strain to get out any seeds. Put all of the mixture back into the pot and add the sugar, lemon juice, salt, Worcestershire sauce, and hot sauce. Bring to a boil. Pack and seal in jars (40 minutes in a water canner).

Pickled Cherry Tomatoes


If you've been following our blog, you know that we ended up planting 30 tomato plants this year due to my new found plant empathy. Among the 30 tomato plants were 6 cherry tomato plants. Andy, of course, nearly had a nervous breakdown when he realized I intended to plant all 6 of them. As many people know, cherry tomato plants typically produce so many little red/yellow/orange bursts of heaven that their gardeners end up feeling as if they are in a multi-colored hell by the end of the season, trying to figure out what to do with the little buggers.

So far, this hasn't happened to us! Granted, we've gotten the suspected amount, but we've been keeping up with them quite well. Mostly, we've been eating them fresh as snacks, but a few days ago we collected quite a haul, so we decided canning was in order.

Among the cherry tomato plants that we planted is a tiny breed, smartly named the Gold Rush Currant Tomato. The fruit grows to a 1/4 to a 1/2-inch diameter. They have been especially plentiful and seemed the perfect fruit for pickling! We also canned one quart of the Riesentraube Tomato, which has also been a bountiful producer.

Pickled Cherry Tomatoes (makes about 2 quarts)
1 quart water
2 Tbs. kosher salt
1 lb. cherry tomatoes (firm, even a little under-ripe)
1/4 cup granulated sugar
dill or herb of choice (to taste)
dried hot pepper (to taste ~ we used 1/2 of one large for each pint)
garlic cloves (to taste)
approx. 12 peppercorns

2 cups white vinegar

Sterilize 2 pint jars or 1 quart jar. In a pot, bring water, salt, vinegar, and sugar to a boil. Meanwhile, prick each cherry tomato with a pin so that it can absorb the pickling mixture. Put dill, dried hot pepper, peppercorns, and garlic into jars. Fill jars with cherry tomatoes. Once the pickling mixture is boiling rapidly, pour over the cherry tomatoes, leaving 1/2-inch head space. Process in boiling water canner.


Ready for the brine.