Pin It

Saturday, January 27, 2024

Chicken-Keeping Advice

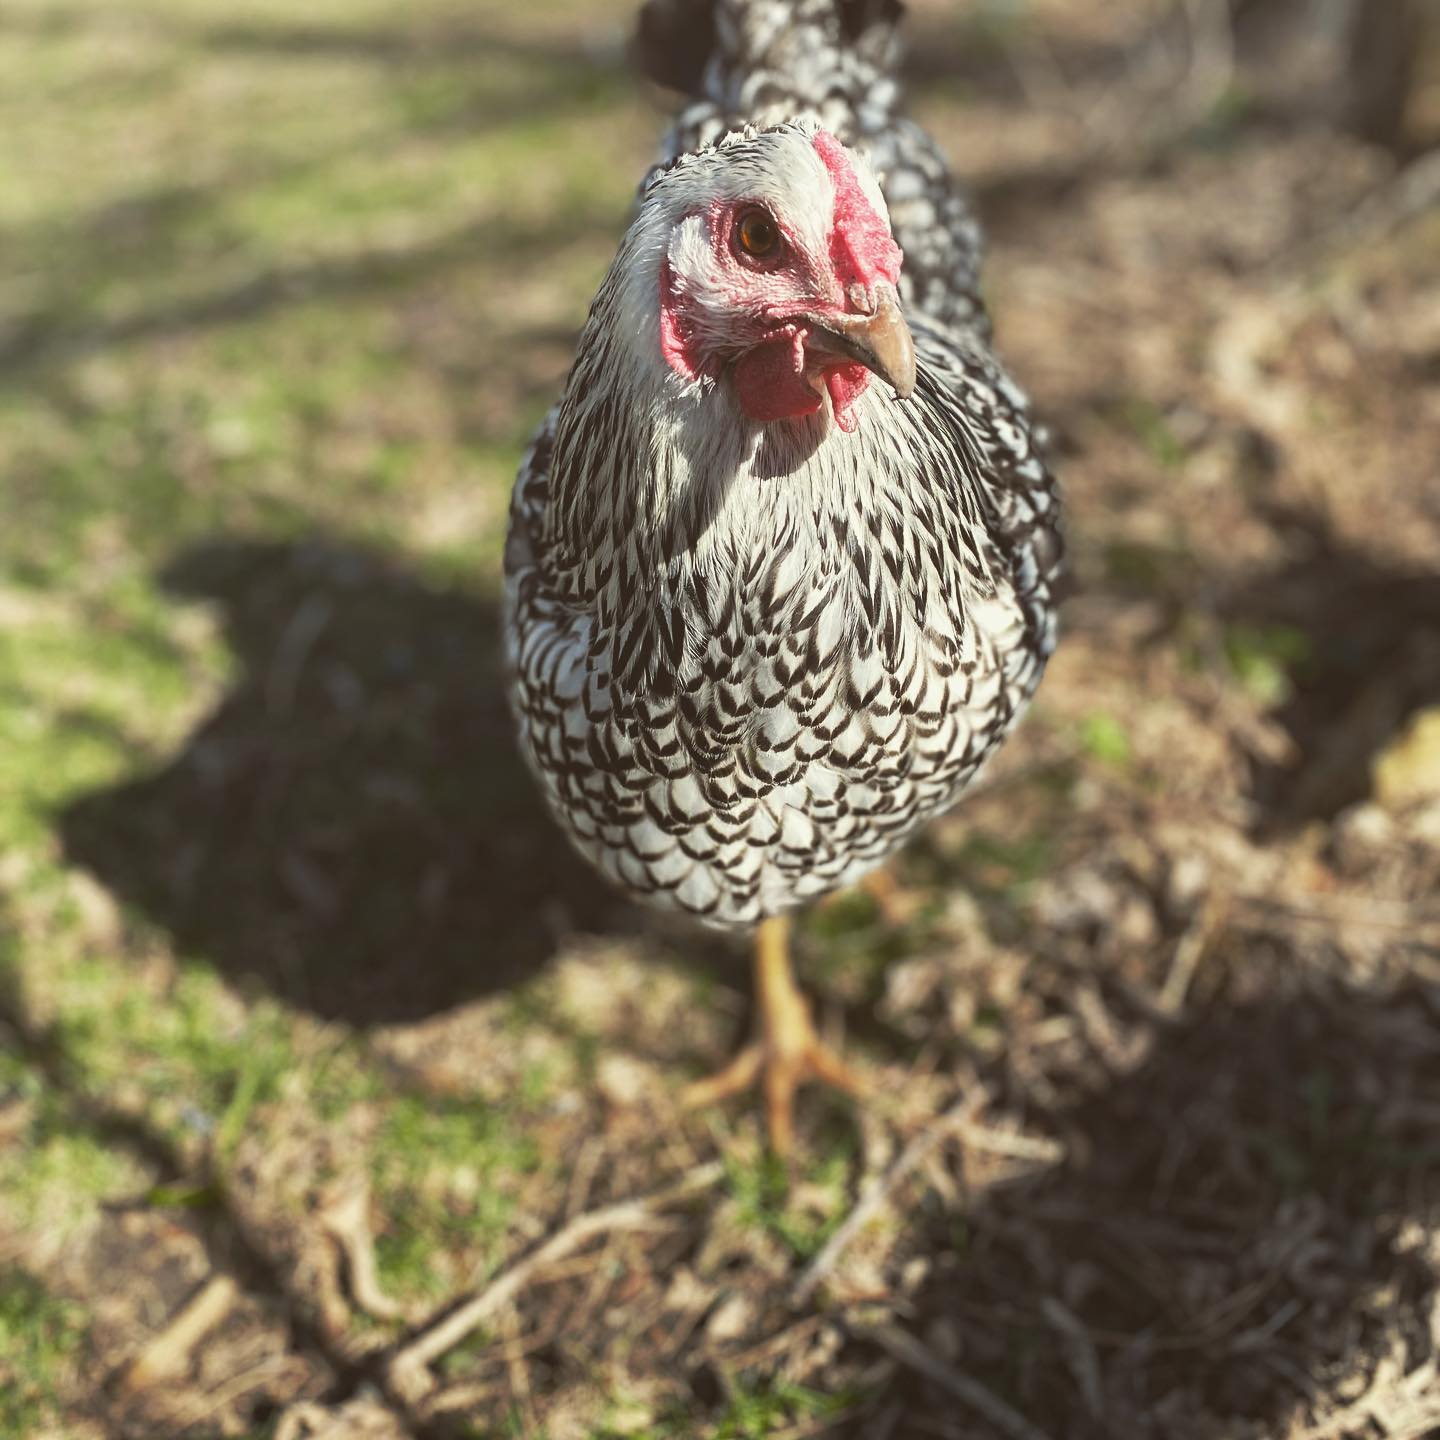
Cardi B, a hilarious flock member

 I'm working on a grad school assignment around multimodal literacies, and when I paused to think about something that I've become quite literate in during my adulthood, chicken-keeping came to mind quite instantly. I'm grateful for this assignment because it has brought me back to this blog, which for years, I've been telling myself to come back to -- mostly because when I blog about sustainable living, I am more attune to it and because blogging gives me a reason to write, which without reason, I often put off even though it brings me peace and joy. 

Today, I'm going to focus on advice that I would personally give to new chicken-keepers after 13 years of chicken-keeping with my husband on our little homestead right outside of Madison, Wisconsin. 

Getting Started:

1. Obviously, check the ordinances for where you live. The last thing that want to do is purchase and fall in love with some chicks only to have to rehome them. Many cities are expanding their chicken allowances: Madison, Wisconsin now allows 8 hens. 

2. Get the Marek's vaccine. I've posted about this before, but it is something you can easily add on. We lost an entire flock. Also, don't get chicks from an unknown source. This is often how chicken diseases are spread. 

3. You'll need a brooder. Make it more spacious than you think because the chicks grown quickly! If you're adding to a flock, pullets need to be nearly the same size as your existing chickens in order for a safe transition. 

4. Bond. Spend lots of time handling the chicks. The more time, the better for your long-term relationship and ease of handling for illness, vet appointments, and so on. 

5. Make sure your coop is predator-proof. Get a hawk-proof netting. Use hardware cloth rather than chicken wire around your run. Put pavers or garden-beds around your run to prevent digging predators a way in. 

Day-to-day maintenance:

Beautiful Adele, with space to play.

1. Continue that bonding as often as time allows. 

2. Did you know that you can freeze eggs if you get too many? You can! Simply crack them open into a Ball jar and write the number of eggs inside. Pop into the freezer. When your hens are molting or not producing eggs, these will come in handy! 

3. Feed them healthy table scraps. Most veggies and fruit are okay, and the they not only make your chickens healthier, they also make the eggs more nutritious. 

4. Make sure they have space to run and play. Whether that means that you give them time to run around your yard each day or you have an amazing run, healthy and happy hens need space. 

5. Close your coops every night. No matter how secure that you think they are. 

6. If it's too hot outside, make sure you're problem solving. You can spray down the outside of your coop with cold water. You can give your hens frozen veggies or fruit. Make sure there is shade and that you're giving your chickens enough water throughout the day. 


Other things I've learned:
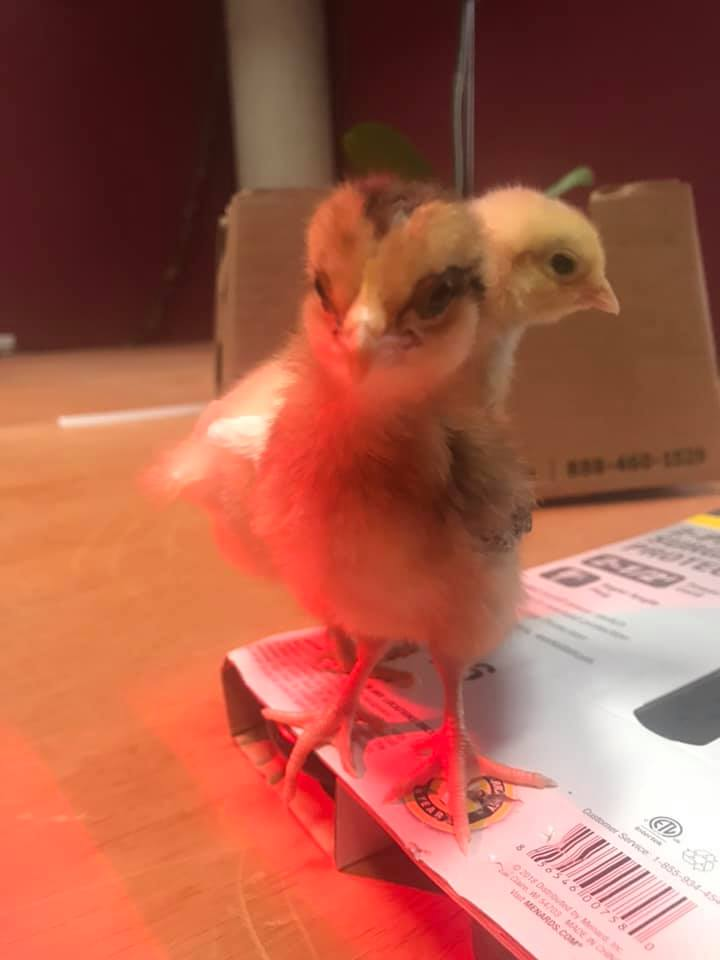
Day-old chicks

  • If you're anything like me, you don't want to contribute to the violent death of any animal. When
    we order only female chickens, we must think about what's happening to the roosters. It's not great. If you have space, you can have a bachelor pad of roosters as long as there are no hens in sight. Something to consider! I, like most people, assumed that roosters could never coexist. 
  • Chickens purr when cozied up on your lap, near sleep. How cool is that! 
  • Chickens tend to molt in the fall --> you'll notice that many of their feathers are gone. It is quite painful for them, so avoid picking them up during this time if possible. 
  • They dust-bathe. It's adorable. 
Have fun with your chickens! They are a pleasure to have! I love talking chickens, so feel free to post questions! 


Sunday, August 30, 2015

Bourbon and Blueberry Bundt Cake with Blueberry-Basil-Bourbon Glaze

What could be better than a dense, delicious, fruity bundt cake? One drenched in bourbon, of course!

This recipe was inspired by a list of ingredients from our friend and house-sitter. When asked how we could repay him for taking care of our chickens, cats, gardens, and dog while we gallivanted around the northern part of the country, he replied with his usual, kind, "Make me dinner."  He suggested a list of ingredients and among them  were blueberries, bourbon, and basil. Upon our first attempt with googling the ingredients, we discovered this combination makes quite the popular doughnut choice.  Who knew?

We went to the trusty Paprika app on our iPad and found several recipes for blueberry-bourbon cakes and glazes, but settled on  modifying this one, and then we added our own extra alcohol-y twist with a Bourbon Sauce.  Despite an appetizer of fried plantains, a peanut stew for dinner, and drinks to fill in the rest, we all had room to indulge in this keeper!

The amount of bourbon that we added to this cake would make a sailor whistle. The first saucepan of bourbon sauce soaked right in, so we cooked up another. We added that, which proceeded to soak right in as well. And then we added the glaze on top, full of bourbon. Despite using almost a bottle, the bourbon melded delightfully well with the blueberry and basil flavors. The cake was rich and moist, and it made my summer night feel all the more summery. I predict that it will make snowed-in, wintry nights all the more wintry, too.

Without a doubt, this cake will show up on our table again soon.

Ingredients for the cake:
3 cups flour
1 tsp. baking powder
1/2 tsp. baking soda
1 tsp sea salt
1 cup unsalted butter
1 1/2 cups sugar
1/2 cup firmly packed brown sugar
4 eggs, at room temperature
1/2 tsp. vanilla
1/4 cup bourbon
1 cup buttermilk, at room temperature
1-2 cups blueberries (depending on your preference)

Ingredients for Bourbon Sauce (we ended up making three batches of this...we like ours real dense!):
1/2 cup bourbon
1/2 cup unsalted butter
1 tsp vanilla extract
3/4 cup sugar

Ingredients for Glaze 
1 cup fresh blueberries
1 Tablespoon fresh basil, chopped
2-3 tablespoons bourbon
3 cups sifted powdered sugar

Directions:
1. Grease a 10-cup metal tube or bundt pan. Preheat the oven to 350 degrees F.
2. To make the cake, sift together the flour, baking soda, baking powder, and salt in a bowl.
3. Cream the butter and sugars together on medium-high speed until fluffy, about five minutes.
4. Blend in the eggs, one at a time and add the vanilla. Combine the bourboun and buttermilk in a bowl. With the mixer on low, add the flour mixture in three parts, alternating with the bourbon mixture in two parts.
5. Pour the batter evenly in the bundt cake pan. Bake until the cake is golden and springs back when touched, about 40 to 45 minutes.
6. Before the cake is finished, you'll make the bourbon sauce. Heat a small saucepan and melt the butter. Mix in the sugar and vanilla.
7. Remove the pan from the heat, pour in the bourbon, and combine butter mixture with bourbon.
8. Put the pan back on the stove and heat until slightly bubbly. Sugar should be dissolved.
9. Poke holes in your finished cake, and pour the sauce over it. You can reserve some for the top, if you'd like.
10. Let the cake completely cool, and then flip it over onto a serving platter.

11. To make the glaze, start by pulsing the blueberries, basil, and 2 Tbs of bourbon in a food processor or blender until smooth.
12. In a large bowl, measure out the powdered sugar. Gradually stir the blueberry mixture into the sugar. Taste and add the last Tbs of bourbon if you desire. Drizzle over cooked cake.

13 And then, if you like strong libations in your bakery, you can always add more of the Bourbon Sauce! 

Wednesday, August 19, 2015

Salty and Crispy: Kale Chips

Kale chips have been all the rage for a few years. And why wouldn't they be? Salty. Crispy. Can't Stop At Just One. And (semi) nutritious. What could be better?

They're super easy to make, and it's fun to play with different seasonings and flavorings. I like cracked pepper!


Ingredients:
A bunch of kale
Olive oil
Salt
Seasonings of your choice

Process:
1. Wash kale to remove dirt.
2. Rip chip-sized pieces off the rib of the kale. Discard the ribs. Use salad spinner to dry kale pieces.

3. Toss kale pieces with enough olive oil to lightly coat throughout.
4. Spread on cookie sheets.

5. Sprinkle with salt and other seasonings (I love pepper, for example!).
6. Bake at 350 for 10-12 minutes, or  until kale chips are crisp.

We store ours in open ziploc bags with a piece of paper towel to soak up excess liquid over time.
They should last for up to a week.

Enjoy!  

Monday, August 3, 2015

Pickled Beets, 2015


Full disclosure: this recipe is 100% not our own. The reason? Every year, I forget from which source I located the pickled beets recipe because I have never blogged about pickling beets. I go searching online, browsing through other cookbooks....only to just choose something random and different each and every year. So, I'm shamelessly blogging about a recipe I found in a cookbook.

And ... the beets in this cookbook are wonderful! Slightly sweet, tangy, and perfectly pickled, this is my favorite recipe for pickled beets thus far. At this pint, I fully endorse The Complete Book of Small-Batch Preserving. Granted, this is the only recipe from the book that I've seen to fruition, but I bought this gem only a month ago. I love that the cookbook focuses on small batches because, let's be realistic, I live with only one other human: we can only consume so much food. 

Anyway, try this pickled beets recipe! We used chioggia beets and golden beets, hence the interesting colors in the jars. We also a little more than doubled this, so we ended up with 4.5 quarts

Easy Spiced Pickled Beets (makes 4 pints)

8-15 pounds of fresh beets
2 cups sugar
2 cups white vinegar
1/3 cup water
16 whole cloves
8 whole allspice berries
2 cinnamon sticks, about 4 inches long
2 tsp pickling salt

1. Trim beets, leaving 1 inch of stem and taproot attached. Put in pot and cover with water. Bring to a boil, and then turn down heat, cover, and simmer for 25 to 45 minutes. Be careful not to overcook them! Cook just until tender..... 

Once tender, drain and rinse with cold water. Remove skins and cut beets into desired size pieces. If you have chickens, be sure to save the scraps! They loved them....
Chicken treats or compost ingredients?
2. Combine sugar, vinegar, and water in a large saucepan. Bring to a boil over high heat. Stir occasionally. 

3. In sanitized, hot jars, place 4 cloves, 2 allspice berries, and 1/2 cinnamon stick in each jar. Pack beats into jar. Pour hot liquid over beets to within 1/2 inch of rim. 

4. Process 30 minutes for 2-cup jars and 35 minutes for 4-cup jars. 


Thursday, January 1, 2015

Pinterest and Sweet Potato Pie Dip

2014 was my year of Pinterest!  This pin was the basis for building a floor-to-ceiling bookshelf in our house. We now have a shelf behind our sofa in our small living room because I saw this pin.  I brought a cheesy, gooey Jalapeno Popper dip for a Christmas Eve appetizer thanks to this pin. I used the recipe for a tart, sweet, and spicy Jalapeno Cranberry dip on this pin for Thanksgiving, Christmas Eve, and again for New Year's. Last night, I made a creamy Sweet Potato Pie dip because I thankfully pinned this a while back.

I'm blogging about the Sweet Potato Pie dip because it is definitely a keeper, I want to make a minor adjustment to the original recipe, and family members who sampled it last night asked for the recipe AND suggested alternate uses for leftovers, which I want to share here.

Dip:
1 (8-oz) block of cream cheese, softened
1 cup brown sugar
2 cups cooked, mashed sweet potatoes
2 Tbs butter
1 tsp vanilla
1 tsp cinnamon
1/4 tsp nutmeg
Graham crackers or ginger snaps

Pecan Topping:
1/4 cup brown sugar
1/4 cup white sugar
1/4 cup butter, melted
1/2 cup dry oatmeal
1/2 cup chopped pecans


 Directions:
1. Preheat oven to 350.
2. When oven is ready, bake the sweet potatoes until they are fork-tender.
3. Mix together the cream cheese and brown sugar. Add the mashed sweet potatoes, butter, vanilla, cinnamon and nutmeg. I used a food processor to get the consistency nice and smooth.
4. Mix together all the ingredients of the pecan topping. I added oatmeal to the recipe because when I made it according to the original recipe (without oatmeal), the butter pooled on the top. Adding the oatmeal will give the dip a crisp-like feel and will eliminate butter pooling.
5. Sprinkle the topping on top. Bake for 15-20 minutes and serve with graham crackers and/or ginger snaps.

This dip was so good that by the time I remembered to take a photo for the blog, we had it 1/4 eaten!

For leftovers (if you  have any) or if you just want a twist, this would make a classy dessert served in nice glasses decorated with a cookie dipped onto the top. You could also add a dollop of real whipping cream or ice cream on top.

Pinterest treated me well in 2014. Hoping 2015 brings the same type of success!


A Feast for Our Chickens, 2015

This New Year's Day, we decided to celebrate the lives of our backyard flock chickens. Inspired by Heartland Farm Sanctuary's Feast for the Turkeys event, we made up a meal in which the chickens were the honored guests rather than the main dish.

We halved a few Delicata squashes and filled them with a mix of cranberries, beets, carrots, kale, yogurt, and Bob's Red Mill 10 Grain Cereal.

One half squash for each chicken
We spread them throughout the run.
 As you can see in the pictures below, our chickens were delighted. Rocky, the rooster, expressed  his excitement by getting a case of the hiccups.

Our youngest chickens, hatched on August 18th, are a bit more skittish around us than any of our other chickens have been. Surrounded by squash goodness, they hung out around us this morning as they enjoyed their feast. What a treat for all of us!


Happy New Year!

Monday, November 3, 2014

Salads in Jars

Yumminess before the jars.
A couple of years ago, I made my first set of salads in glass jars for lunches; they were convenient and delicious, but I fell into my old habits and reverted back to leftovers and soups. This past week, our CSA box contained a bag of spinach and another bag of salad greens and carrots and celery and radishes and broccoli and I thought -- hey! I should really get back to those salads.

By the way, making salads in mason jars for weekly lunches is so much faster than making a pot of soup. Duh, right?

The brilliant news is that jar salads stay fresh for a solid 5-7 days. I'll post a picture of Friday's salad later this week just to confirm.


What are the rules?
  • Put the dressing at the bottom. I used 2 Tablespoons, which was plenty for me.
  • Then, put something that can serve as a barrier between the lettuce and dressing. Obviously, this layer is going to get the most exposure to the dressing, so choose a more sturdy vegetable. I used carrots, celery, radishes, and broccoli for this week's salad. Use whatever you have. 
  • Next, add a grain or noodles, if you'd like. I used a quinoa this week.
  • If you're up to it, a protein such as cheese or hard-boiled egg goes next.
  • Finally, the greens themselves.
How do you eat it?
  • I take a bowl to dump mine into, but you could also try your luck just diving right into the glass jar.
  • Just dump it right in!
I use Myfitnesspal.com to track my calories and nutrition information, and I got an immediate green (which is good!) on the fiber section. The other side benefit of making salads in jars is for the sheer aesthetic pleasure of it! They are beautiful.


Monday, August 25, 2014

New Brooder Equals Unrivaled Space

Our friend Fjud spent his Sunday building our chicks a bigger brooder. Because we got the chicks so late in the season and because winter here is so brutal, we are going to  have to keep these babies inside a bit longer than we have when we've gotten them before, in the spring or early summer. Not wanting them to get crowded, we proposed a sort of inside coop/brooder to our construction-savvy friend. He was up to the challenge.

This is what former chicks and the newbies have resided in....


Now, check out their new digs....


Notice the perching bar to the left.

Easy access to allow chicks out to play. This will be useful for introductions to the big hens, too.

View upon opening the above door.

View of entire operation


We couldn't be happier with the results. This is a project that will benefit us for all future poultry endeavors. Thanks, Fjud!

A Flock in Chaos: A Tumultuous Week of Backyard Chicken Keeping

Spindy, on one of her in-home nights
This week, we put down Spinderella (our favorite hen), got a set of 4 baby chicks, and buried one of said baby chicks. It was a tumultuous week for the flock and for its owners.

Back in July, Spinderella began acting lethargic, not excited for the mealworms or cherry tomatoes she so loved. We found a local vet who often works with hens; she diagnosed Spindy with fatty liver. She predicted that we may have called too late, but she gave us instructions to feed Critical Care (actually made for guinea pigs) through a tube twice daily and to give Spindy some R and R inside. We followed instructions, and Spindy's crop got nice and full.
Some TLC

As soon as we put her outdoors again, Spindy began riding a roller coaster of health. One day, we thought she was better; the next she spent the day puffed out under a tree. When the heat index increased on Friday and Saturday, she began floundering around, unable to stand. Even in the air conditioning, she was panting, and we knew it was time.

To all of those hard-core farming types out there, this is where we former city-dwelling, inexperienced, overly compassionate and sentimental homesteaders fail. We took Spinderella to the emergency vet and paid to have her put to sleep via injection. I rationalize this expense by remembering why I wanted backyard chickens to begin with: to give animals who provide me with food a happy life, filled with dignity. There is just no way either my spouse or I have it within us to end her life in the more traditional methods, though we have discussed seeing if we can buy the injection supplies needed for future situations. At the vet, both of us felt the pain and stress of putting a pet down, which to me, means we had succeeded in giving Spindy the type of life I had wanted for her.

On the other end of the week, on Monday, the 18th, four chicks hatched at My Pet Chicken and were shipped our way!  Their fuzzy little bodies are a delight to anyone!

Our friends' kids have flocked here this week, and we've personally enjoyed watching these little ladies grow feathers and flutter around. Our flock is comprised of hens with musically-related names, and this year we let our nieces and friend's daughter name the hens.

We have a:
Eleanor Annie Cosette (Eleanor for Eleanor Roosevelt - strong woman; Annie for Annie Lennox, Cosette from Les Mes)


P!nk


Katy Perry


One of the chicks, our Buff Orphington, didn't make it.

RIP Little Taylor Swift
We came home from dinner (the same day on which Spindy was put down) to find our little chick face-down in the brooder. We are unsure what happened, but we suspect heat. It was a sad day around these parts.


For now though, we'll enjoy the sound of our little peepers singing away in their brooder...and so will the mammals


Sunday, June 1, 2014

CSA: A Bi-Weekly or Weekly Venture?

Everything consumed in time for Box 2!
For years, we've picked up a weekly CSA box on Saturday mornings from the first weekend in May to roughly the end of January. As our farmer predicted, by year three, we had a system to either eat everything or freeze or can that which we did not consume in a week's time. We did well. Our friends would marvel at how we, two people, managed to eat so many veggies.

Well, those days seemed to be over last year. With the purchase of a quarter cow and half of a pig (to be eaten by the omnivore in the family), we found ourselves with loads of roots and greens that ended up being chicken treats by week's end. Additionally, our gardens have grown exponentially in the past half decade, and when we bought a house in the country, we had hoped to someday be much more self-sustainable.

It seemed the time had come to downsize our CSA box, but we have commitment problems hence no children, no addition to the house...you get the idea. Even downgrading our CSA order seemed so daunting, but we took the leap (sarcasm intended for those of you who can never figure out my sense of humor!).

Well, on May 10th a CSA box was delivered to our normal pickup site, and we weren't on the receiving end. Admittedly, we felt a bit deflated. We doubted our decision. Then, May 17th rolled around. What a joyous occasion to see overwintered spinach and parsnips, freshly dug sunchokes, thick pink stalks of rhubarb, and the bright spring green of sorrel. Heavenly.

We think we made the right decision as this past Saturday, the 31st, we picked up our second box and were able to fit all of our new veggies in the fridge because ... get this: all of our other veggies had been consumed in the past 2 weeks. Regardless of how this first month went, we're going to keep track of how often we run out of veggies too early, how often the chickens are benefiting from our lack of consumption, and how much our gardens are contributing to our overall eating plans. We want to be decision-ready come 2015's order.

Something I made last week that was springy, healthy, and entirely local was Sunchoke-Parsnip soup, adapted from our very own Harmony Valley Farm newsletter. Here's how I made mine:

3 sunchokes
4-5 parsnips
2 Tbs. olive oil
1.5 tsp of salt
1 Tbsp butter
2 Tbs. chopped ramps (onions would work too)
1 quart water
2 cups fresh spinach
1 Tbsp lemon juice
ground black pepper, to taste

Instructions:
1. Preheat oven to 375 degrees. Cut parsnips and sunchokes and put them into a baking dish with oil and salt. Roast for 30-45 minutes, or until vegetables are tender 


2. Melt butter in a small saucepan. When the butter has melted, add the ramps and saute. Add the roasted parsnips and sunchokes and water and bring all to a simmer. Simmer for 10 minutes.
3. Remove from the heat and stir in the spinach. Once the spinach is wilted, transfer all to a food processor and blend until smooth. Adjust the seasoning and serve.

Makes 4-6 servings.
Nutritional information per cup:
Calories: 113
Carbs: 10
Fat: 8
Protein: 2
Sodium: 28
Sugar: 5


Monday, April 21, 2014

Spring!

It is spring, my favorite season of the year. So much potential. So much excitement. So many new beginnings. More than at New Year's, I find myself coming up with resolutions to do better, be more focused, use my energy in more productive ways, and to find happiness in everyday moments. This winter has been especially trying for me as my father passed away the day after Christmas, in the middle of what always seems to be a difficult season anyway. But just like the green grass in spring always can be counted on to appear, one always finds herself on the other side of grief. Spring affirms that there is always new life, new love, new opportunities. This spring, I plan to capitalize on the positive energy that the re-arrival of warmth, plants, late and sunny nights, and all things green give me. One of the ways in which I hope to be better and more productive is to write more about the happenings around the homestead and keep up with this blog.

So, here it goes:  spring in Dane County has arrived!  In the quiet of the morning, the sounds of birds chirping and the hens scratching, purring, and clucking are ever-present. Rocky, the rooster, is back at his business with the ladies, and we find 3-4 eggs in the coop per day.

The spring flowers are up, and buds have formed on all of the perennials. Last year, we planted honey berry plants, service berry trees, and gooseberry plants, and they are shiny and green. We haven't seen any bees buzzing around, and we've yet to remove the insulation from the hive, so we're not sure of the state of the hive, but most hope that they've survived the many negative temperature days is gone.

Despite the bees, spring remains the time in which I feel everything gleeful rests on the horizon.
Honeyberry plant

Garlic shoots

Aronia and grapes
The dark, cold winter is over for now, and I plan to live every moment of spring in the present, basking in it all.

Sunday, September 8, 2013

A Ratatouille of Sorts

My last post was based off of another person's recipe. This post is based off of another person's recipe. Apparently, I've been more into reading recipes than  I have been into whipping up original creations lately. That said, this ratatouille feels like the answer for every overzealous gardener who finds him/herself with an abundance of veggies. Like the Swiss Roll recipe I posted last month, the ingredients in this recipe are flexible; I've made two different versions during this week alone.

The inspiration for this comes from The Week magazine's "Recipe of the Week" page. Officially called "Ratatouille tian," this is often served over rice or as fillings for a sandwich. Here at our house, we simply make it and serve it up. We also don't have the proper baking ware -- the tian is actually the earthen baking ware used traditionally. We simply used a glass pie pan, which seems to work just fine.

I also would recommend adding in sliced sweet peppers or other vegetables that would caramelize well. 

This recipe is easy to put together, but does require about 1.5 hours of baking!

Ingredients:
3-4 small eggplant
salt
3 tsp herbs de Provence
3-4 zucchini
6-8 Roma tomatoes
olive oil
2 yellow onions
8 fresh sage leaves, minced
2+ garlic cloves, minced

Directions:
1. Cut eggplants into 1/8-inch sections.  In a colander, toss with a teaspoon of salt. Let sit for one (or more) hour(s). Transfer to a bowl, and add a teaspoon of herbs de Provence.
2. Cut zucchini and tomatoes into 1/8-rounds. Put into two separate bowls. Sprinkle each vegetable with 1/2 teaspoon salt and 1 tsp herbs de Provence.
3. Preheat oven to 350. Lightly oil baking dish. Thinly slice onions. Spread them evenly on the bottom of the pan. Drizzle with olive oil and sprinkle with salt.
4. Arrange a row of one of the vegetables along the side of the...pack them tight enough that they almost stand upright. Follow with another row of vegetables. And then the other. Alternate to fill up the pan. If you have extras at the end, simply stuff them into the rows.
5. Drizzle with 3 Tbsp olive oil, spread the minced garlic and cut-up sage leaves among the veggies, and cover loosely with foil. Bake for 30 minutes.
6. Turn up the heat to 425, and bake 30 more minutes.
7. Remove foil, and bake for 30 more minutes or until the veggies are tender, and the tips are lightly browned.
8. Serve  hot, warm, or cold.

Thursday, August 15, 2013

Swiss Chard Rolls

The recipe I want to share with you all today is not my original recipe; it is stolen, but it makes such a delicious and healthy product that I feel compelled to write about it. And it was "stolen" from our CSA newsletter, which makes me feel a little bit more okay with my almost-recipe-plagiarism.

All wrapped and ready to go.
Anyone who has ever grown Swiss Chard and/or collard greens knows that it can be hard to keep up with cutting, using, and really maximizing all of bounty that a few plants offer. I freeze bags full for smoothies and winter stews, but enjoying it in its actual season, and near its raw state, is satisfying. This recipe lends itself to just that.

And one word about the ingredients: like any fold-able food (think burritos, egg rolls), the ingredients in these rolls can vary. I enjoyed the creamy texture that the avocado provides with the slight kick from the jalapeno in this version, but building these really requires a grain, a sauce, and some diced veggies. I intend to play with various versions and spice combos, but I do not doubt that I will come back to this exact version from time to time.

We enjoyed this at an evening at Concerts on the Square with a bottle (or two) of Chardonnay.

Swiss Chard Rolls 
by Chef Beth, Harmony Valley Farm

Makes 8 rolls

8-10 large chard leaves (we also used collard greens)
1/8 cup yellow squash, small dice
1/8 cup cucumber, small dice
1 half avocado, small dice
1/2 cup black beans, rinsed
1 cup seasoned quinoa, cooked
Juice from one lime
1/2 jalapeno pepper, small dice
2 Tbs mayonnaise
1/2 medium sweet Spanish onions, small dice
1 tsp salt
1/2 tsp coarse pepper

1. Bring large sauce pan of salted water to a boil. Blanch each chard or collard green leaf by holding onto the stem, placing the leaf in the boiling water for 15 seconds. Then, transfer to a towel and pat each leaf dry.
2. In a mixing bowl, mix all other ingredients. One by one, fill the leaves, ribbed side facing up, with a spoon of the mixture.
3. Fold in the sides of the leaves, and fold into a roll. Finish by cutting the stem and cutting each roll in half and place on a serving tray. Serve.

Monday, May 27, 2013

Barbacoa, Take Three

I have been on somewhat of an unintentional blogging hiatus. Work and life sped up, and blogging took a backseat. This Memorial Day weekend's barbacoa rejuvenated me in more ways than one, and I've revived my writer's bug. There exists nothing quite like a day of cooking with people whom you love to get the creative juices flowing.

In years past, along with our friends, we have tried to put goat or lamb meat in the ground under a fire. Once we burned through the pot, and the second time, we didn't cook the meat enough and had to reheat it in the house. This year, we attempted another approach: we put the meat, water, and maguey leaves in a pot and set it on top of the fire for the day. It seems like it was quite the success: according to the meat-eaters, the meat tasted tender and juicy.

While the barbacoa turned out well, we did have a bit of a fiasco with our carnitas. My good friend, Gaby, came over in the morning to prepare both the lamb meat for the barbacoa and also get the pork meat going for the carnitas. I watched as she added containers of lard, orange juice, milk, and a bit of caramel to the pot, and finally the pork. It smelled delicious. She left to get ready for the day; I went outside and, being the non-meat-eater that I am, I figured all was well with the cooking meat. But, by the time Gaby returned, the pork had turned to charcoal.  As a vegetarian, I felt guilty that the pig meat was a waste...but mistakes happen, and next time, I'll know to pay more attention. No use crying over burnt pig.
Carnitas before they became charcoal


Friends arrived, and the feast exploded. Someone brought carnitas (thank you!). Salsas, rice and beans, berry pie, chocolate cake with cream cheese frosting (with a cayanne kick), beer, beer, beer, tequila and lime drinks, hibiscus tea, Thai tea, chorizo, tortillas, fruit salad, and more salsa filled three tables. We gorged ourselves. Some of us took naps. Others of us needed coffee to help digest. A few of us poured insane amounts of leftover grease onto the campfire (yes, we  have a pyromaniac on our hands). Friends told stories. New friends got to know one another. All of us laughed.
Who knew dumping grease on a campfire could be so fun?

Despite the cool Memorial Day weekend, I haven't felt so cozy warm all year. The fire helped, but what really did it were the presence of such wonderful people, the vast amount of such amazing food, and the joy of such a blissful day of cooking. Barbacoa, take three, proved to an enormous success.