Tuesday, October 20, 2009
Planting in the Dark: Garlic
As the days get shorter and work gets more demanding, finding time to live sustainably undoubtedly becomes more challenging. However, one must fight on and prevail. The rewards are just that much sweeter.
Because only Monday and Tuesday of this week were forecast without rain, we needed to use any spare time possible to get next spring's garlic in the ground. Getting cloves planted before the soil freezes is imperative, so we knew it was now or never. As much as our lazy tendencies screamed at us to stay inside enjoying the warmth of the house, we knew we'd be disappointed if we missed the window to plant the garlic and were left to survive on the few cloves per week we get in our CSA box next spring.
Garlic planted in the fall produces much larger heads then garlic planted in the early spring, and when Andy and I think of the perfect garlic head, we think of gigantic heads with cloves the size of silver dollars! So, Andy canceled after-work plans yesterday to till up the garden, and then plant 26 organic, locally-grown cloves. He spaced them 4" to 6" apart with 1" to 2" of soil covering the cloves. We planted our garlic in a very sunny part of the garden, in soil that is well-draining and not stony ~ all important ingredients for big, robust heads of spicy goodness next spring!
Tonight, not getting home until after dark, we had quite a riot insulating and covering our garlic in the dark. We live in a climate where winter temperatures frequently drop below 0 degrees, so we always mulch 3-4 inches. Last year, we used dried leaves, but this year, we were fortunate enough to stumble upon enough free straw. The cool breeze outside and the satisfaction that our little bulbs of perfection were safe from the deep freeze of winter inspired a bit of our own warmth inside: a cup of the chamomile tea which we harvested this summer! Yum!
Spring seems so far off right now, but when the time comes, there is nothing quite like seeing those first little bursts of green, reaching towards the sun, letting you know fresh garden eating and days soaking up the sun are right around the corner. These nights in the dark planting with flashlights, jackets, and the need for a warm cup of tea are no price for the feeling of cutting the first garlic scapes of the season or slicing the spring's first fresh garlic cloves!
Sunday, October 18, 2009
Working with Live Cultures: Homemade Yogurt
Two years ago, while exploring the Viroqua Co-op's amazing book section, we stumbled upon a gem: Sandor Ellix Katz's Wild Fermentation. Since then, both Andy and I have read it cover to cover, enjoying the exciting philosophical food discussions and the innovative and classic fermentation recipes.
Among the sauerkraut, pickles, and kimchi recipes is the classic yogurt recipe. We experimented with the book's directions, but over time, have come to develop our own methods to achieving super creamy, fabulously delicious, and perfectly smooth homemade yogurt.
So what is yogurt anyway?
Yogurt is milk or cream that has been fermented with a good, live bacteria at a consistently warm temperature. Yogurt is a nourishing food with many health benefits: it provides calcium which makes bones stronger, prevents both yeast infections and urinary tract infections, and it provides the body with vitamin B2, which can be somewhat difficult for vegetarians to obtain.
And why make your own yogurt?
Well, for one, making anything by yourself makes you more self-sufficient and is more sustainable. And two, by making your own yogurt, you're able to control how much fat the yogurt contains and you're able to support local dairy farms by purchasing their milk or cream. We use Blue Marble Farm's Milk (Barneveld, WI) or Sassy Cow Creamery's Milk (Columbus, WI). Depending on our mood and for what we will use our yogurt, we use 2%, whole milk, or sometimes a combination of the two.
Homemade Yogurt
Ingredients:
1 quart of milk
1 Tbs. of yogurt starter (take a Tbs of your favorite plain yogurt: be sure it contains live cultures)
1. Heat a quart of milk in a heavy pot until it starts to foam, but not boil (180 degrees F). Use gentle heat, and stir frequently to avoid burning the milk.
2. Remove from heat. Cool to 110 degrees F.
3. Mix in starter yogurt.
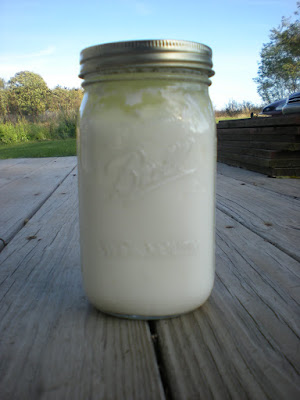
4. Pour into sterilized jar(s), and cap it/them.
5. Place jars in an insulated container, filled with water. We like to use an old fish aquarium with insulation wrapped around the outside. To heat our tank, we use hot water and a submersible heater. Other people we know use a cooler. No matter what you use, the water must be consistently around 100 degrees.
6. Check yogurt after 8 to 12 hours. It should have a tangy flavor and some thickness.
7. Refrigerate when done.
Heating up the milk.
Cooling it off.
Yogurt Starter
Our insulated contraption.
Keeping them consistently warm.
Morning Breakfast with Homemade YogurtCooling it off.
Yogurt Starter
Our insulated contraption.
Keeping them consistently warm.
1/3 cup Nature's Bakery Peanut Butter Granola (or granola of your choice!)
1/4 cup of yogurt
1/2 cup of plain, unsweetened hemp milk
seasonal, fresh fruit (or frozen and thawed in the winter!)
Mix yogurt and hemp milk until the consistency is completely smooth. Add the granola. Chop in the fresh fruit, and voila ~ the best breakfast around!
Subscribe to:
Posts (Atom)